Below are some of the ways you could configure your desktop, smart-phones or tablets so you can always have direct access to your emails.
Accessing From Webmail
To access your mailbox through webmail, do any of the following:
- In a Web browser, visit the URL webmail.example.com, where example.com is the Internet address of your website.
When prompted, specify your full email address as the username (for example, mail@example.com), and specify the email address password. - When logged in to Plesk, go to Mail, and in the list of email addresses, click the webmail icon corresponding to the email address you need.
Note: If you cannot open the webmail page, make sure that a webmail solution is enabled.
Open the Mail section, then the Mail Settings tab, click the name of the domain for which webmail is inaccessible, and select a webmail client in the Webmail menu.
Accessing Your Mail From Window Live Mail
The instructions provided in this section were verified against Windows Live Mail Version 2012. They might not work with earlier or later versions of Windows Live Mail.
To set up Windows Live Mail:
- Open Windows Live Mail.
- Click Accounts > Email.
- Type in your email address and password and select the Manually configure server settings checkbox.
- Click Next.
- In the Incoming server information section specify the following:
- Server type: Select IMAP if you want to keep copies of received email messages on the server. Select POP if you do not.
- Server address: Type in your domain name, for example, example.com.
- Requires a secure connection (SSL/TLS): Select this checkbox if advised by your provider. Otherwise leave it clear.
- Port: Leave the default values unless your provider advises you to use custom ones.
- Authenticate using: Select Clear text if you are using Plesk for Windows and chose POP from the Server type menu. Otherwise select Secure Password Authentication.
- Logon user name: Type in the name of your email account, for example, mail@example.com.
Accessing Your Mail From Mozilla Thunderbird
The instructions provided in this section were verified against Mozilla Thunderbird 31.4.0. They might not work with earlier or later versions of Mozilla Thunderbird.
To set up Mozilla Thunderbird:
- Open Mozilla Thunderbird.
- Click Email under the Create a new account heading.
- Click the Skip this and use my existing email button.
- Specify the following:Click Continue.
- Your name, as you want it to appear in any messages you send.
- Your email address and password.
- Click Continue
- If Thunderbird fails to find the settings automatically, specify the following:Click Done.
- Account type. If you want to keep copies of messages on the server, select the IMAP option. If you do not want to keep any messages on the server, select the POP3 option. Selecting IMAP will also allow you to train the SpamAssassin spam filter on email messages you receive, provided SpamAssassin is enabled on the server.
- Click Done
f you wish to set up a mail account manually, please use the following typical combinations of connection security and authentication method settings. If the settings do not work for you, ask your hosting provider about the correct combination.
On Linux, SMTP, IMAP, POP3:
- SSL/TLS: STARTTLS
- Authentication: Encrypted password
On Windows, IMAP:
- SSL/TLS: None
- Authentication: Encrypted password
On Windows, SMTP, POP3:
- SSL/TLS: None
- Authentication: Normal password
Other parameters that you may need when configuring your account manually:
- POP3 port: 110
- IMAP port: 143
- SMTP port: 25
- Username. Your full email address. For example: johndoe@example.com.
- Incoming server address (POP3/IMAP). Specify your website’s Internet address. Example: example.com
- Outgoing server address. Specify your website’s Internet address. Example: example.com
Accessing You From Apple Mail
The instructions provided in this section were verified against Apple Mail 8.2. They might not work with earlier or later versions of Apple Mail.
To set up Apple Mail:
- Open Apple Mail and choose the Add Other Mail Account option from the list.
- Click Continue.
- Specify your full name, your email address and password, and click Create. After you are prompted to configure the account manually, click Next.
- Specify the following:Click Next. When prompted for additional information, click Next again.
- Account type. Select IMAP if you want to keep copies of received email messages on the server. Select POP if you do not.
- Mail Server. Type in your domain name, for example, example.com.
- User Name. Type in your full email address.
- Password. Type in your password.
- Click Next. When prompted for additional information, click Next again
- Specify the following:Click Next.
- Path Prefix. Leave empty unless your provider advises you to use one.
- Port. Leave it set to Auto unless your provider advises you to use a custom port.
- Use SSL. Select this checkbox if advised by your provider. Otherwise leave it clear.
- Authentication. Select Password from the menu.
- Click Next.
- Specify the following:Click Next. When prompted for additional information, click Next again.
- SMTP Server. Type in your domain name, for example, example.com.
- User Name. Type in your full email address.
- Password. Type in your password.
- Click Next. When prompted for additional information, click Next again.
- Specify the following:
- Port. Leave it set to Auto unless your provider advises you to use a custom port.
- Use SSL. Select this checkbox if advised by your provider. Otherwise leave it clear.
- Authentication. Select Password from the menu.
- Click Create.
Access From Iphone
The instructions provided in this section were verified against iPhone 5s.
To set up a mail account on iPhone:
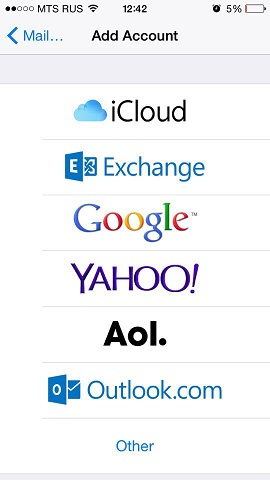
- Go to Settings > Mail, Contact, Calendars and select Add Account.

- In the displayed list of email providers, select Other. Then tap Add Mail Account.
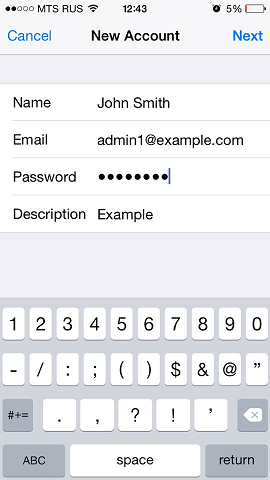
- On the New Accountscreen, enter the following information:
- Name. Specify the name that will be displayed in your emails.
- Email. Specify your full email address. Example: admin1@example.com.
- Password. Specify the password of your email account.
- Description. Specify account description (optionally).
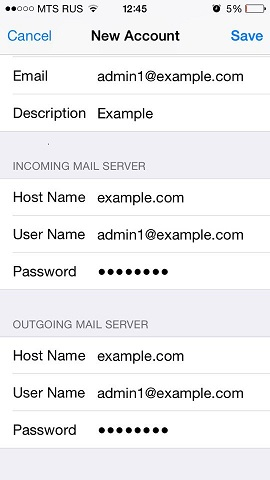
- Tap Next. At the top of the next screen select IMAP (if you want to keep copies of received email messages on the server) or POP. Then specify the details of your incoming and outgoing mail servers. For both servers, you should enter the following:Once the email configuration is added, tap Saveto continue. The connection to the specified server will be verified. If the connection is OK, you will see the screen where you can choose what information you want to sync with your phone.
- Host name. Type in your domain name, for example, example.com.
- User name. Type in the name of your email account, for example, admin@example.com.
- Password. The password to your email account (it is optional for outgoing mail server).
- Once the email configuration is added, tap Save to continue. The connection to the specified server will be verified. If the connection is OK, you will see the screen where you can choose what information you want to sync with your phone.
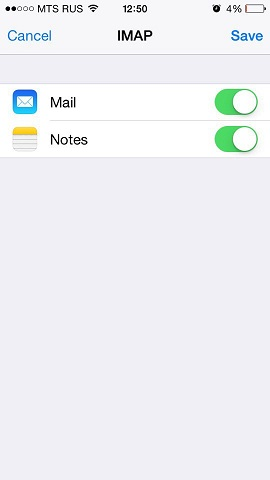
- When all the information is provided, tap Save to save the entered information. Your iPhone will then verify your account information. Upon successful completion, you will be taken to the Mail screen. Your account will now be listed in the Accounts section.
Note: If you are experiencing any difficulties with syncing your messages, you can manually configure the folders correspondence. To do this, select your newly created account and enter the Advanced section. Here you can choose a mailbox (Drafts, Sent, Deleted, Archive) and select a matching folder on the server. This way your folders will be in sync no matter where or how you access your email.
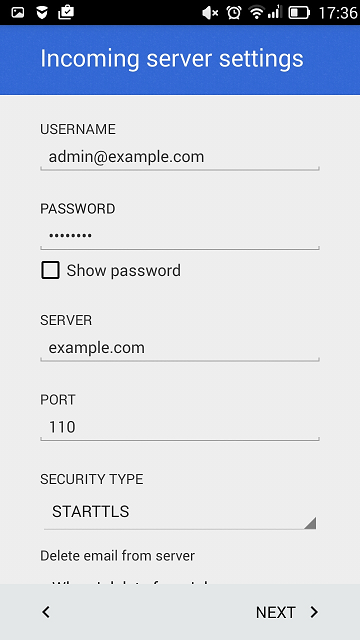
Access From Android
The instructions provided in this section were verified against Android 4.4.2.
To set up a mail account on Android:
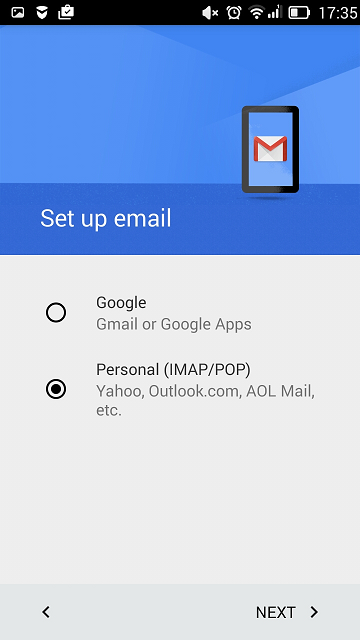
- Open the Gmail app. Touch the menu on the top left. Touch the down arrow to the right of your username and then touch Add account. Then follow the steps described below. To go to the next step, tap Next on the screen.
- On the Set up email screen select Personal (POP, IMAP).
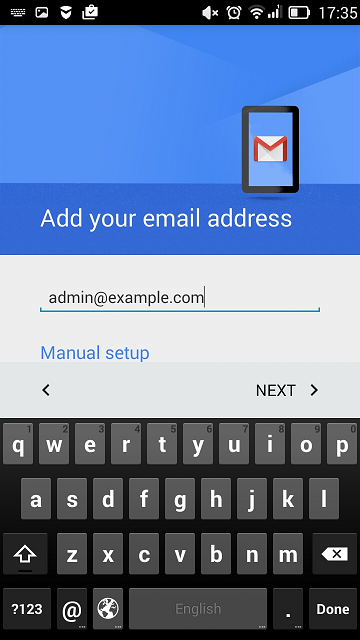
- On the next screen, specify your full email address. Example: admin@example.com.
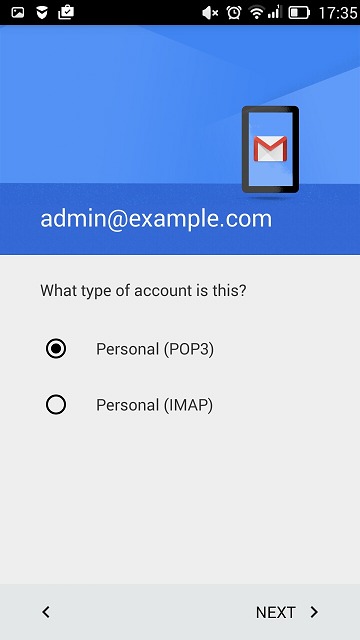
- Specify the type of account. To keep the copies of email messages on the server, select the IMAP option. If you do not want to keep them on the server, select POP3.
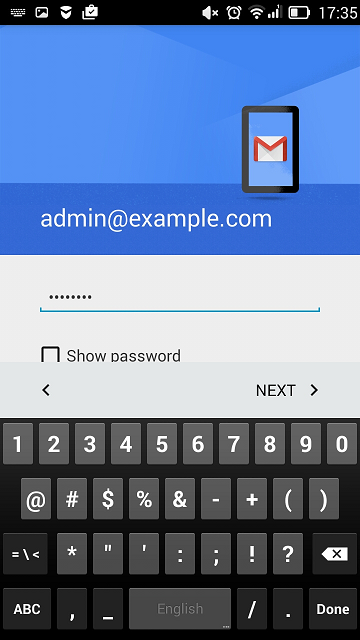
- Specify the password of your email account.
- The next screen displays the settings of an incoming server. Specify the Port number 110 for POP3 or 143 for IMAP.
- The next screen displays the settings of an outgoing server. The port number should be 25.
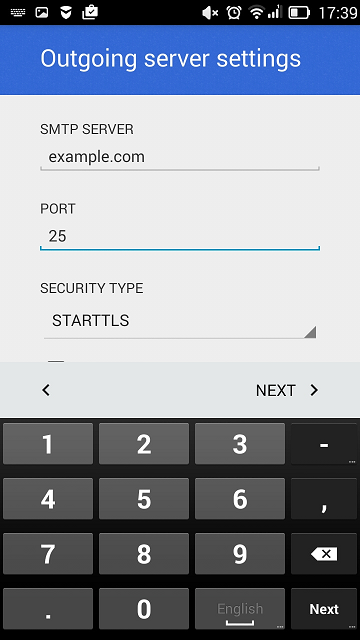
- When all the data is specified, your Android device will check the connection to the server and create your mail account. The new account will be displayed in the list of accounts in the Gmail app.