The CalDAV / CardDAV features are available only for Enhanced mailboxes.
Due to a bug in Android 12 some phones started to delete contacts via Microsoft ActiveSync. Therefore, GroupOffice has implemented a new CalDAV / CardDAV setting that disallows deletes via sync by default now. More info on the bug can be found here: https://eu.community.samsung.com/t5/galaxy-z-fold-z-flip/outlook-contacts-gone-after-android-12-update/td-p/4567744/page/2.
Because this option is disabled by default, you might now receive this error in your CalDAV / CardDAV client:
Deleting is disabled by user sync settings
To enable delete via synchronization:
- Go to the Webmail
- Log in using your full e-mail address and your current e-mail password
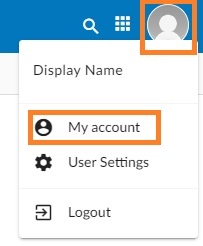
- Click on the User icon from the top right to activate the menu. Then click on My account
- In the Synchronization tab, find the Allow delete via synchronization section.
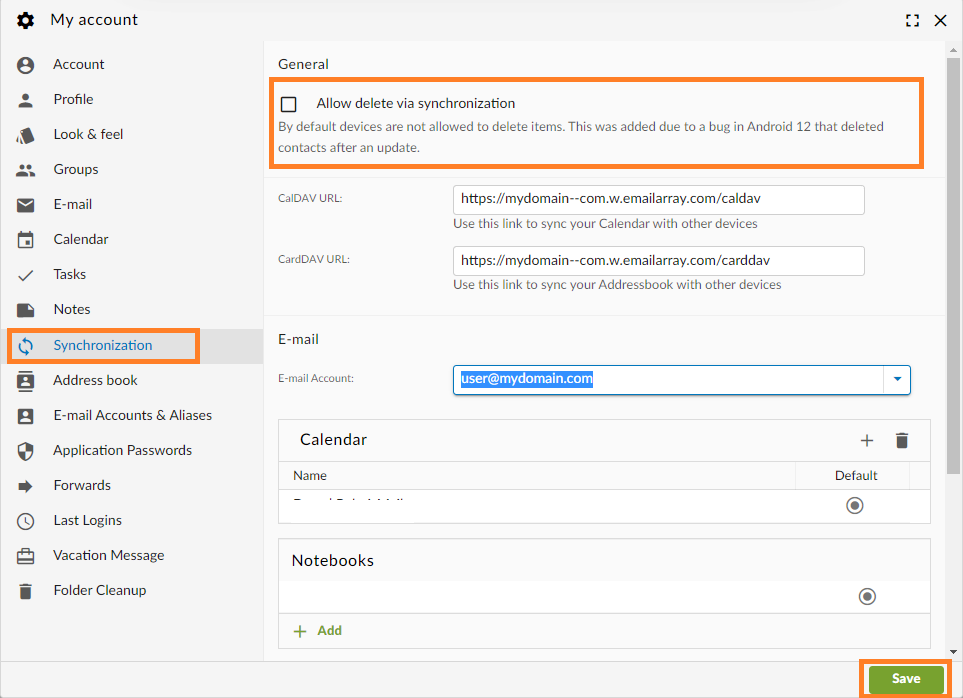
- Enable the feature using the checkmark
- Click on the Save button.
Step-by-step guide
After you log in to your Webmail:
Create a signature
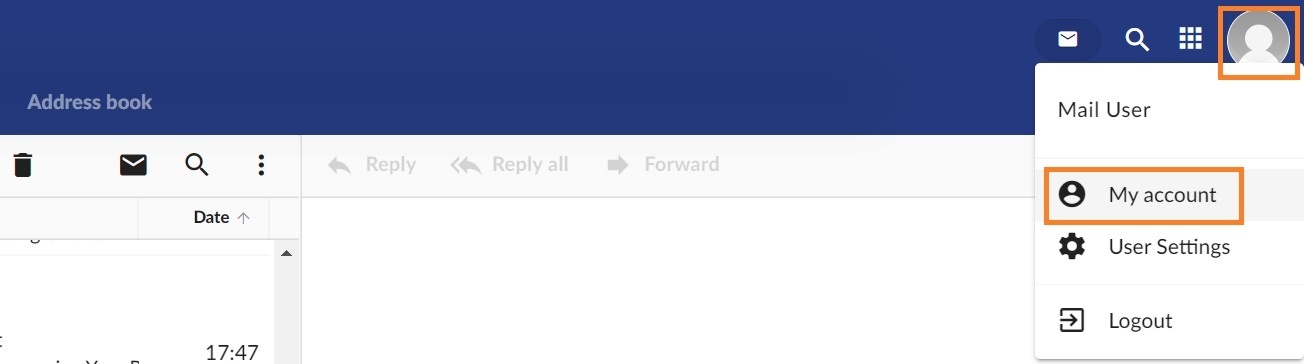
1) Click on your profile image and select My Account from the menu:
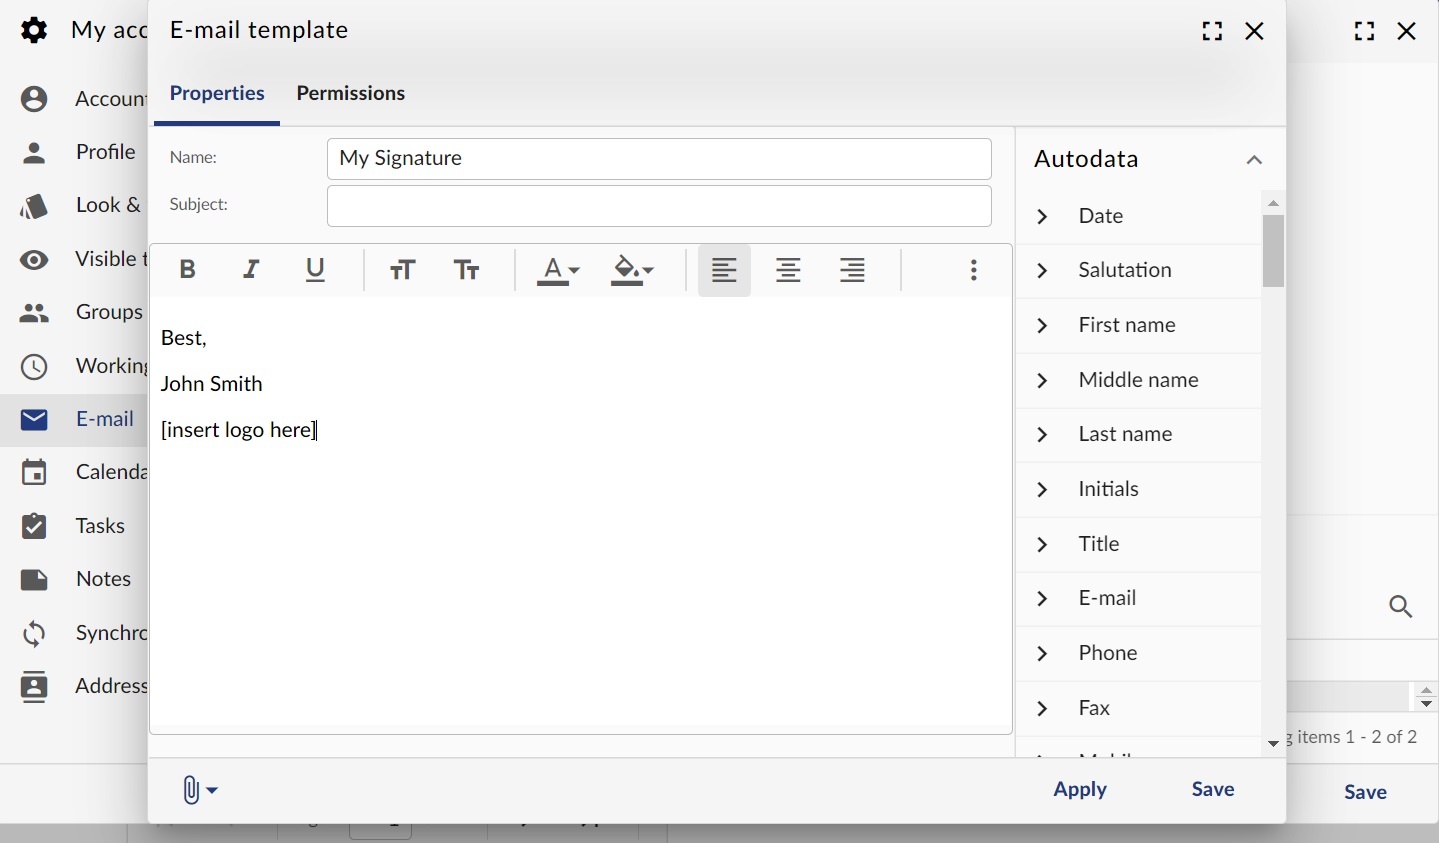
2) From the left pane, click on the Email tab and scroll to the Templates section. Click on the Add button to create a new one.
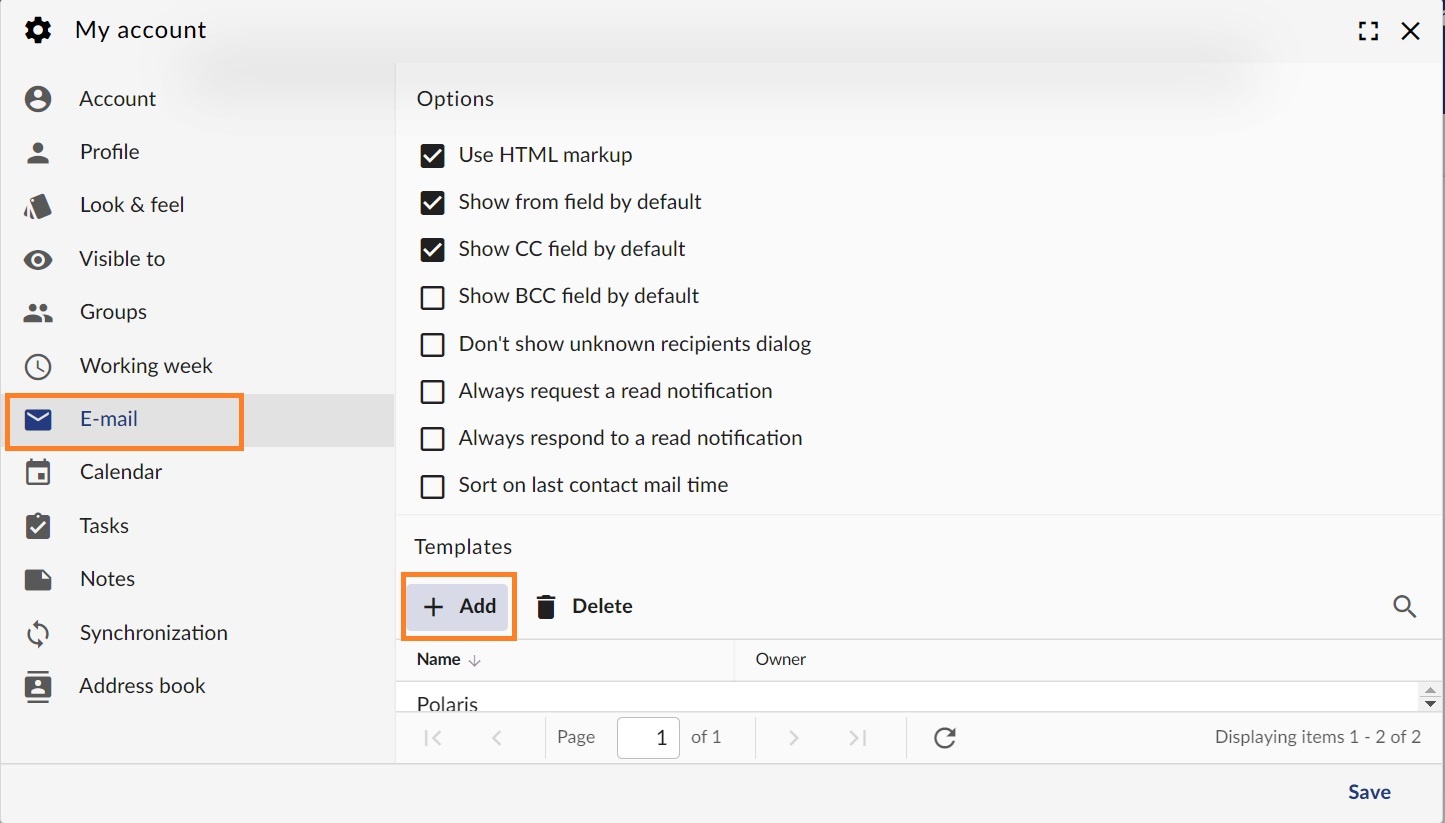
- Create your signature and copy-paste your logo. If you want to edit the HTML source code of the signature, you will find this option when you click the three dots.
- You can use the values from the right tab (Autodata) to personalize your message.
- Click on the Save button when you are finished.
Load a signature or set one as default
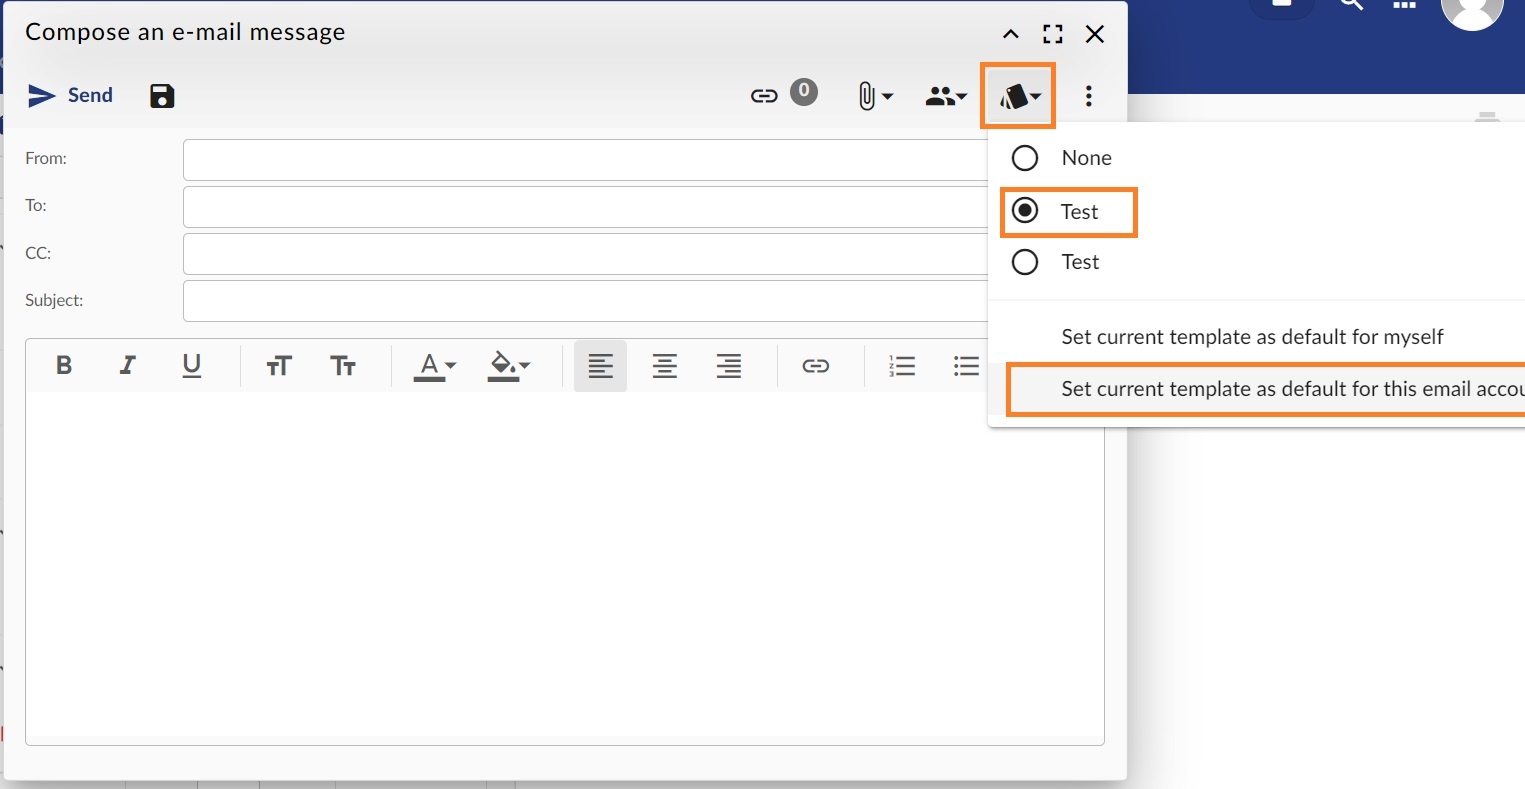
- In the webmail, from the Compose email window, click on the Templates icon (the last icon before the three dots).
- Select one of the signatures to load it in the message.
- Click on the Set current template as default for this email account option to make it the default one.
Step-by-step guide
After you log in to your Webmail,
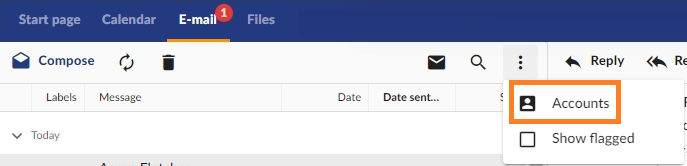
- Go to the E-mail tab.
- Click on the three dots button on the right of the email panel and then click on Accounts.
- Double click the email account that has the Alias.
- Click on the Aliases button.
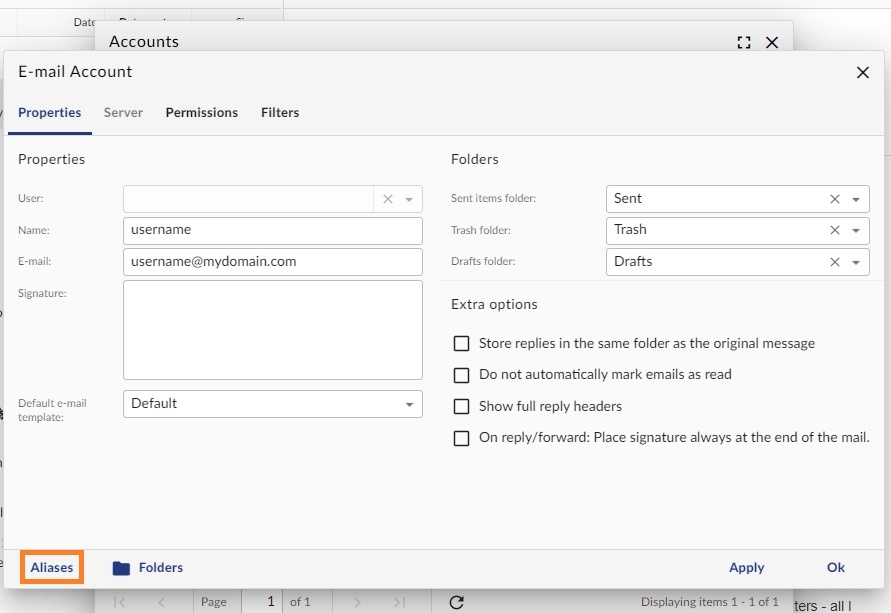
- Fill in the Alias information:
- Name: the name you want to appear in your “From” field
- Email: your full Alias address
- Signature: is optional
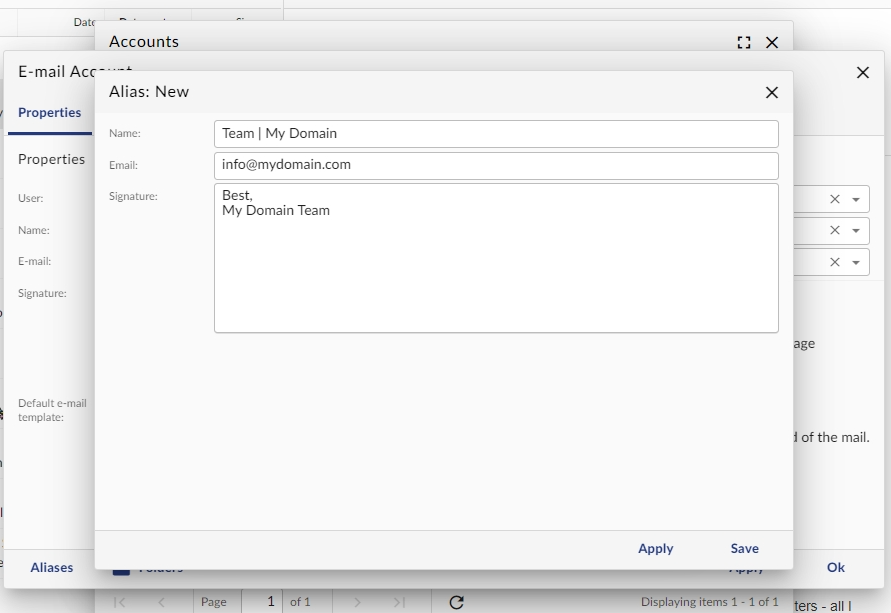
- Click on the Save button.
Step-by-step guide
Subscribe to a Folder
Subscribing to a folder will make it show in your e-mail folder list (usually on the left side of your Webmail or e-mail client). Some e-mail clients will show by default all folders, even the unsubscribed ones.
To subscribe to a folder, log in to your Webmail and
- Go to the E-mail tab.
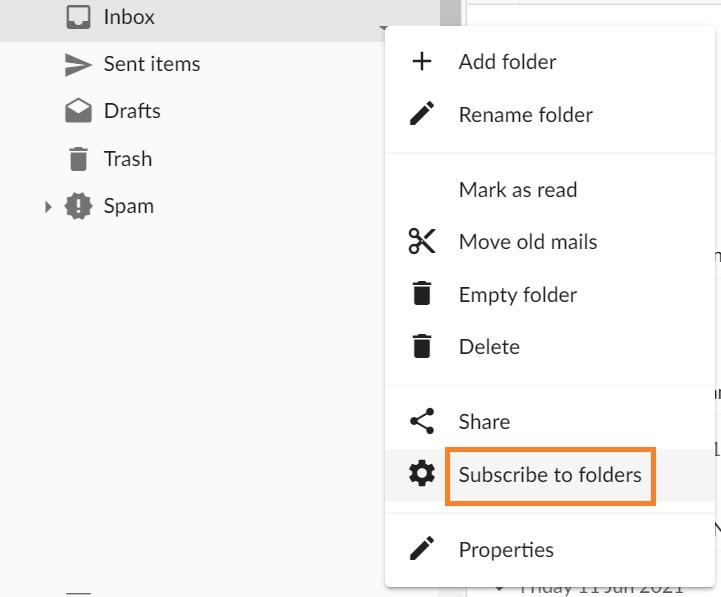
- Right-click on the folders list on the left side of your panel
- Click on the Subscribe to folders option to access the Folder settings
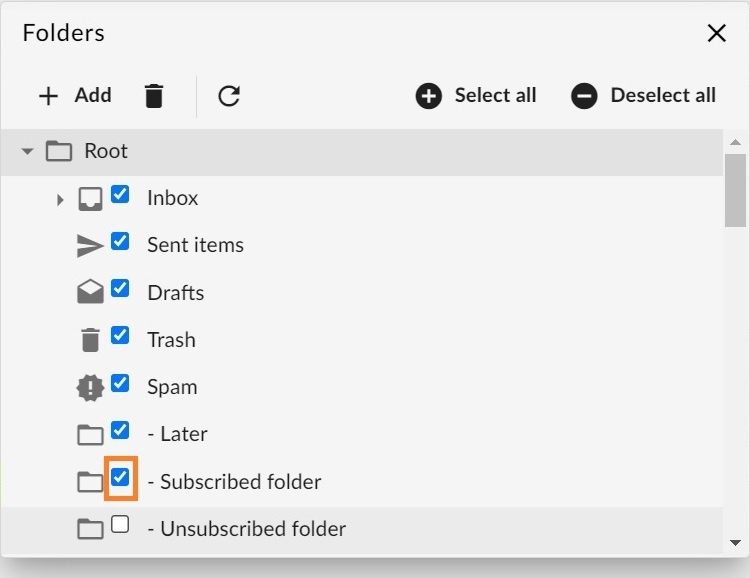
- Find the folder in the list
- Select the checkmark next to the desired folder (if a folder is checked, you are subscribed to that folder).
Unsubscribe from a Folder
Unsubscribing from a folder will hide it from your e-mail folder list (usually on the left side of your Webmail or e-mail client). Some e-mail clients will show by default all folders, even the unsubscribed ones.
To unsubscribe to a folder, log in to your Webmail and
- Go to the E-mail tab.
- Right-click on the folders list on the left side of your panel
- Click on the Subscribe to folders option to access the Folder settings
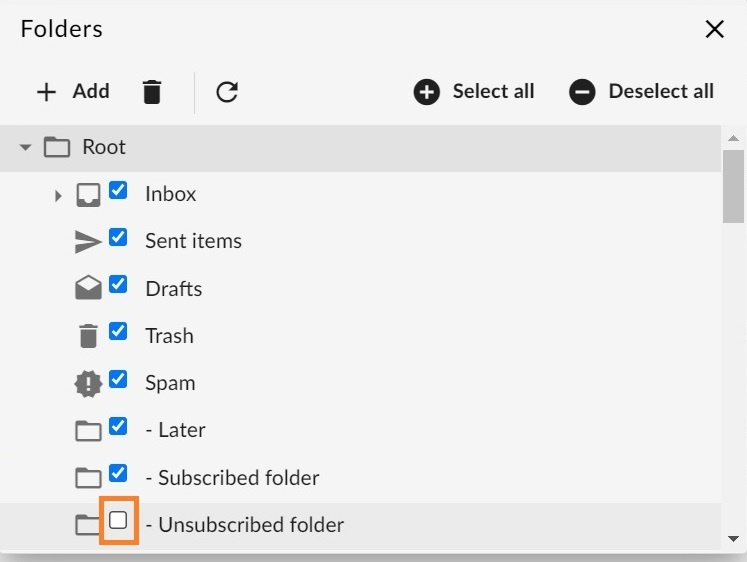
- Find the folder in the list
- Select the checkmark next to the desired folder to unsubscribe (if a folder is unchecked, you are unsubscribed from that folder).
Add a Folder
The easiest way to add a new folder to your mailbox is from the E-mail tab.
Log in to your Webmail and
- Go to the E-mail tab.
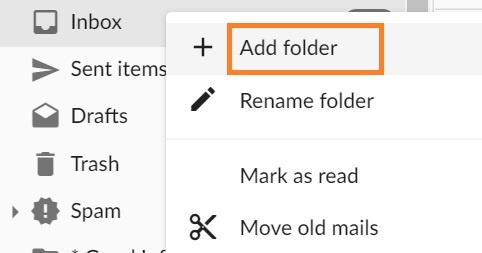
- Right-click on the folders list on the left side of the panel
- Click on the Add folder option from the menu
- Enter the folder name and click on the OK button.
Another option to add a new folder is from the Folders advanced menu. To access it, log in to your Webmail and
- Go to the E-mail tab.
- Click on the three dots button on the right of the email panel and then click on Accounts.

- Double click the desired email account
- Click on the Folders button
- Click on the Add button
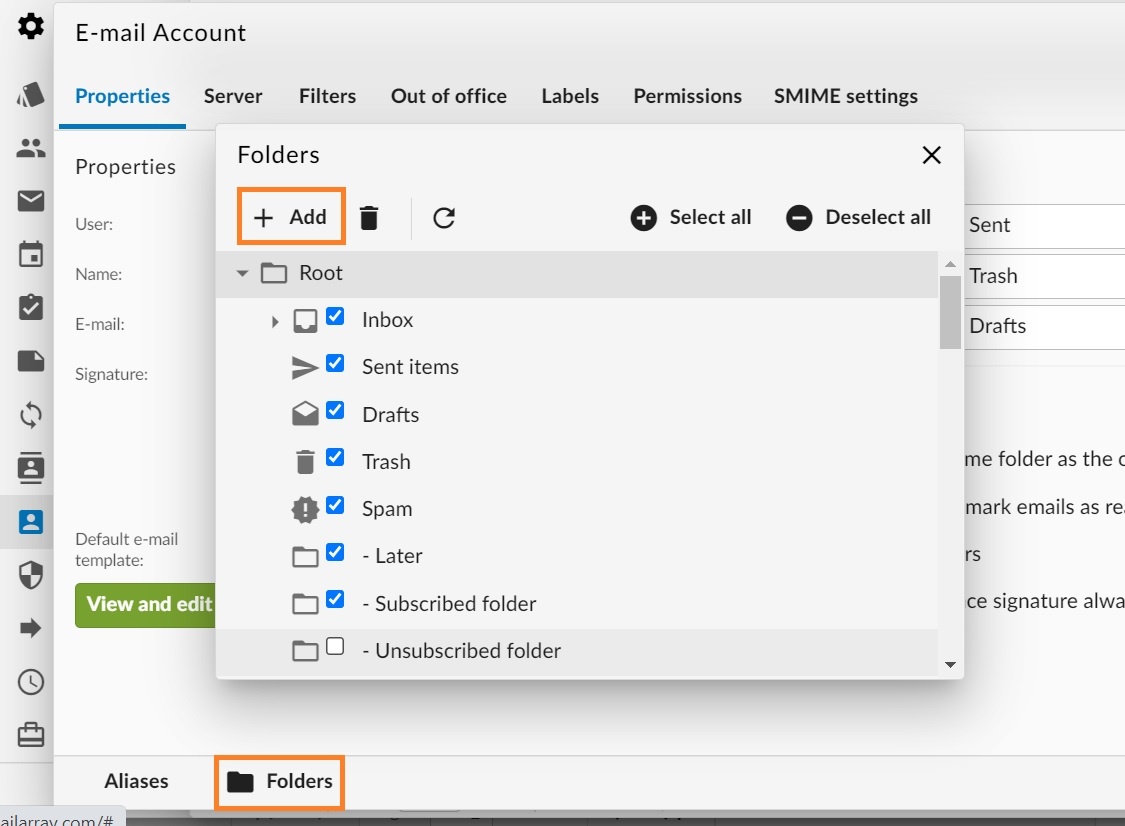
- Enter the folder name and click on the OK button to create the folder.

Symptom: The messages that you send out come back as a bounce message with the following error:
553 sorry, that domain isn't in my list of allowed rcpthosts |
Cause: SMTP Authentication is not enabled in your e-mail client
Solution: Enable SMTP Authentication in your e-mail client
Symptom: When sending out a message, you receive the following error:
451 You have exceeded your messaging limits |
462 Daily send limit reached. Please try again tomorrow |
Cause: You have sent more than 300 e-mails during the day thus reaching your daily send limit.
Solution: If the usage is legitimate and you need your limit increased, contact Support. If you did not send that many e-mails, immediately run a full virus scan of your computer, change your email address password or contact your administrator.
In the user control panel, option Track Deliveries, you are able to see how many messages the account has sent out in the last 24h.
Symptom: When sending messages out, the server repeatedly asks for your username & password, despite having entered the right ones
Cause: If you are sending out using the regular port 25, it is possible that your local Internet Provider is intercepting SMTP communications on port 25 and forcing you to use their own SMTP servers. Your SMTP credentials would thus fail against their servers
Solution: Change your outgoing SMTP server port to another value. You can use ports 26 or 587 for regular/TLS server or port 465 for SSL service.
Symptom: When sending out a message, you receive the following error:Sorry, you are blacklisted on this server
Cause: Usually happens when you have your own account in its own blacklist and try to send a message to from/to yourself or when Outlook does its account test, during account setup.
Solution: Access your account’s control panel, Filtering > Blacklist, do a Control F and search for your own e-mail address, then click on the minus sign (-) next to it, to remove it.
Symptom: When someone sends you an email, they get the error below:
552 cuda_nsu sorry, you are blacklisted on this server
Cause: You changed default domain or user filtering settings inside the Filtering option. Instead of using the default Accept e-mails from Everyone, such option was changed to Accept e-mails from whitelist and address book only, which means account will receive e-mails only from addresses in the whitelist or contacts and all other e-mails will be rejected.
Solution: Change the mentioned option to Accept e-mails from Everyone. Verify both on admin (domain level) and user control panels, by clicking on Filtering, in the top menu.
]]>Enhanced mailbox only
Enhanced mailboxes allow you to sync calendars (CalDAV) and contacts (CardDAV) across multiple devices with applications that support the CardDAV/CalDAV protocols.
In Outlook you can sync via CalDAV / CardDAV by installing the caldavsynchronizer – an Open Source plugin that you can install on your computer and use with your Outlook. This plugin supports Outlook 2007 to Outlook 2016 and is Free and Open-Source Software (FOSS), licensed under AGPL 3 and developed by Alexander Nimmervoll and Gerhard Zehetbauer. You can find the project on Github and SourceForge.
This is a step-by-step guide to installing and setting up the caldavsynchronizer plugin.
1. Download the caldavsynchronizer
You can download the caldavsynchronizer plugin from the project’s website: https://caldavsynchronizer.org/.
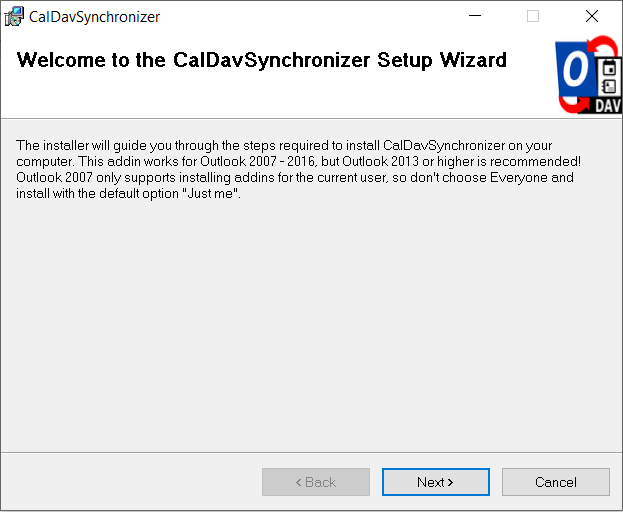
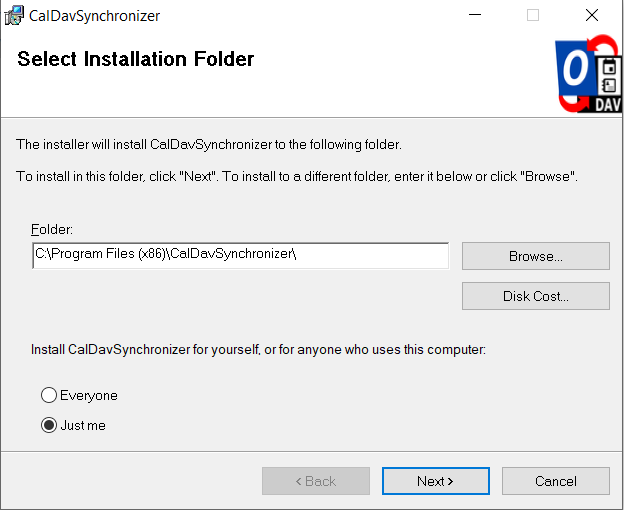
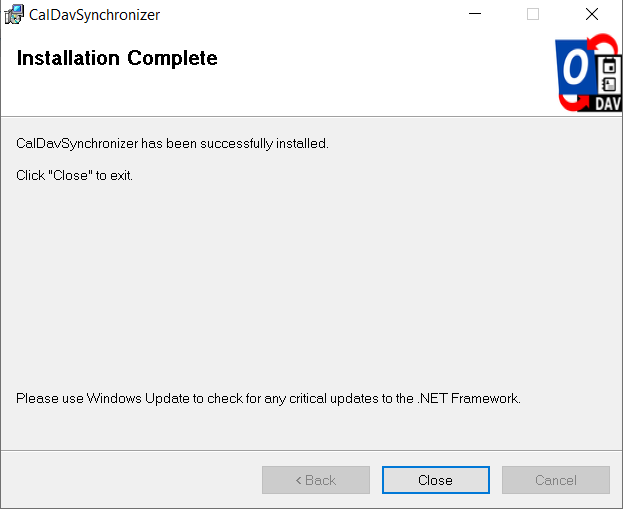
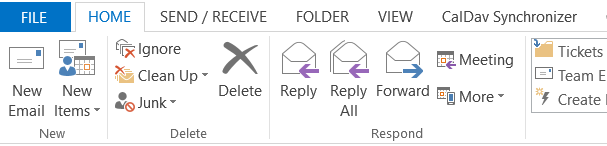
2. Install the caldavsynchronizer
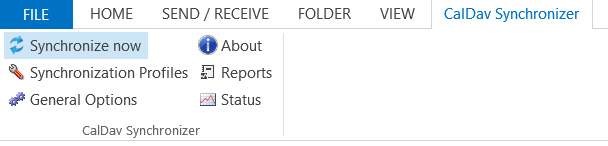
Extract the downloaded .zip file and start the installation. Once the installation is complete, you will see a new ribbon called “CalDav Synchronizer” in your Outlook.
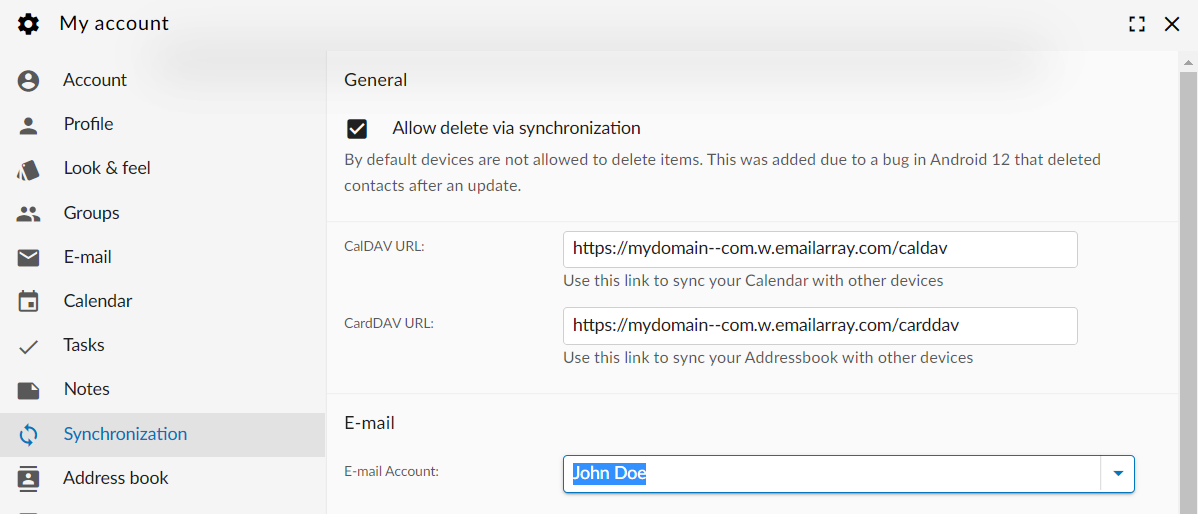
3. Get your CalDAV / CardDAV URLs
First, you need to obtain your CalDAV / CardDAV URLs. CalDAV is for Calendar synchronization, and CardDAV is for Contacts.
- Go to the Webmail
- Log in using your full e-mail address and your current e-mail password
- Click on the User icon from the top right to activate the menu. Then click on My account

- In the Synchronization tab, find the CalDAV / CardDAV URL. You will need to copy and use these URLs with the caldavsynchronizer.
4. Set up the caldavsynchronizer
- Open Outlook on your computer.
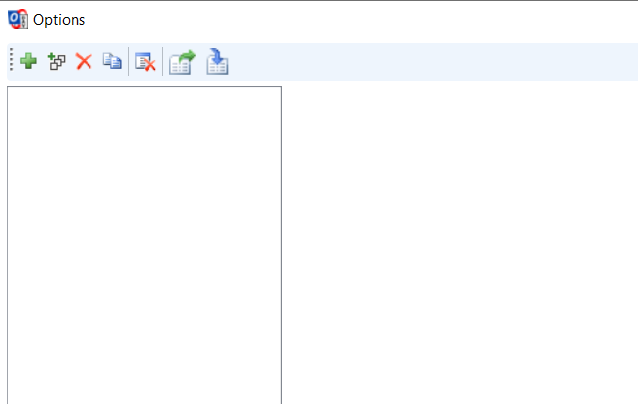
- Go to the CalDav Synchronizer ribbon. Click on the Synchronization Profiles option.

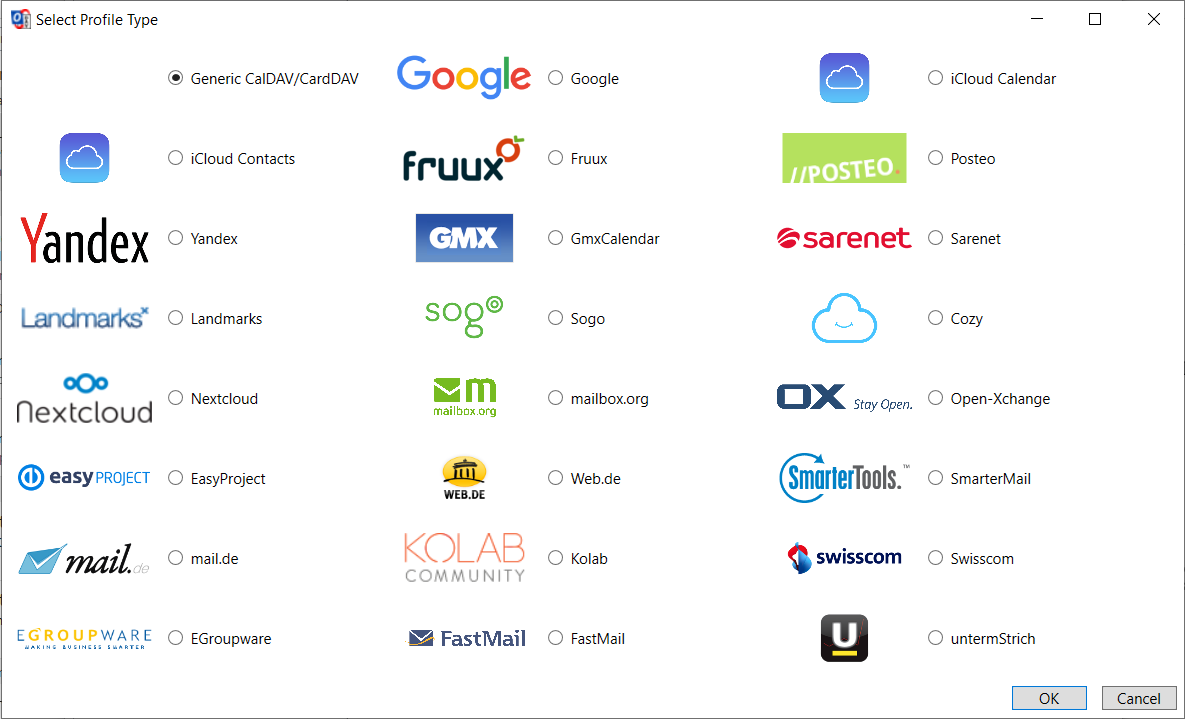
- Click on the Add button (plus sign) to set up a new Calendar or Addressbook to sync. Select the profile type Generic CalDAV/CardDAV.
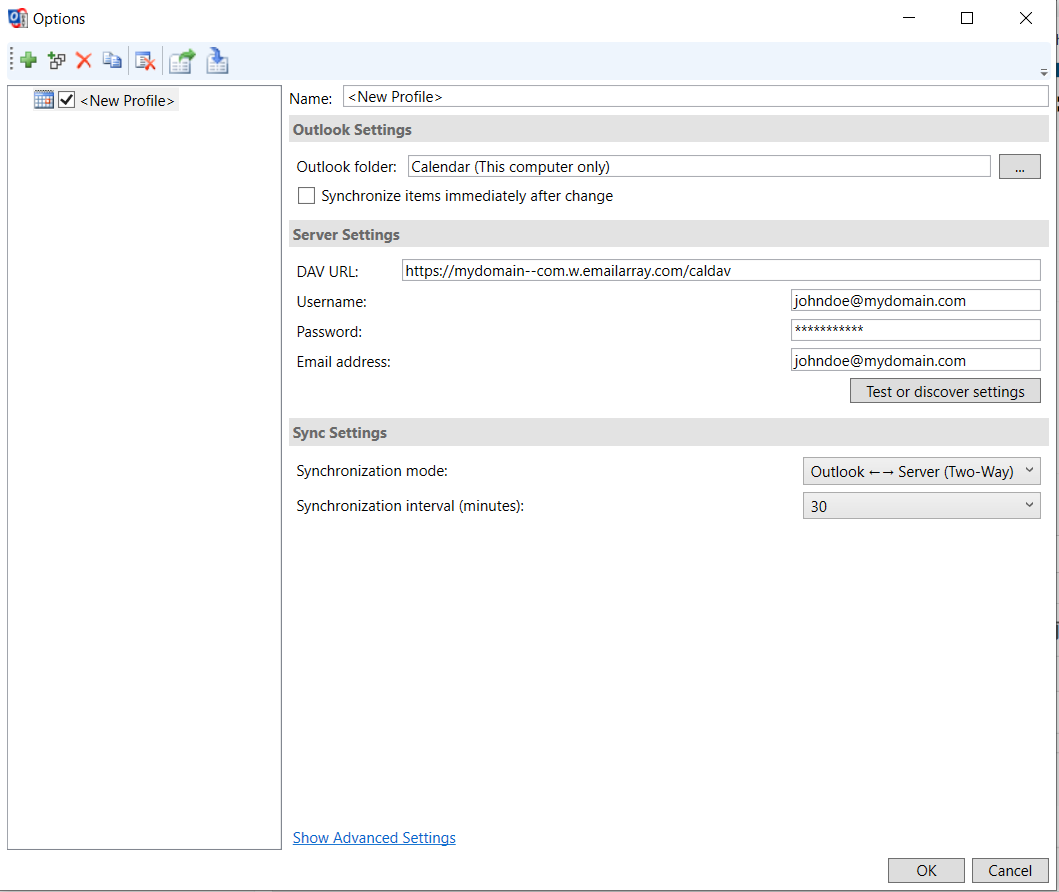
- A new profile window will show. Fill in the following details:
- Name: give a name to this profile. For example, Calendar – personal, or Calendar – work.
- Outlook folder: create a new folder in the Calendar Items or Contact Items category. You can also choose an existing Calendar or Contact folder.
- Server Settings: these are your CalDAV / CardDAV details:
- DAV URL: if you’re adding a Calendar, use the CalDAV URL obtained from the Webmail at step 3. This URL should be in the form of https://mydomain–com.w.emailarray.com/caldav – be sure to replace mydomain–com with your own domain name. If you’re adding a Contact list, use the CardDAV URL.
- Username: your full email address
- Password: your email password
- Email address: your full email address
- Click on the Test or discover settings button. If you have multiple Calendars (or Contact lists) you can choose which one of them to sync with this Profile.
- Sync Settings: choose how and how often to synchronize the Profile. We recommend the Outlook
 Server (Two-Way) synchronization mode.
 - After you finish the setup, you can choose to synchronize items immediately after change by ticking the option in the Outlook Settings. Please note you can only activate this option after you have finished the above setup and clicked on the Test or discover settings.
- Click on the OK button to finish setup and save changes.
5. Synchronize your new Profile
If the synchronization didn’t start automatically, you could manually sync by going to the CalDAV Synchronization ribbon in Outlook and clicking the Synchronize now option.
You can now set up a new Calendar or Contact list by adding a new Profile (step 4).
See below how to disable local delivery to an account (incoming emails are NOT stored in the e-mail account).
Disabling local delivery for an account
Option 1: from the Webmail
- Go to the Webmail
- Log in using your full e-mail address and your current e-mail password
- Click on the User icon from the top right to activate the menu. Then click on My account
- In the E-mail tab, find the Local Delivery section.
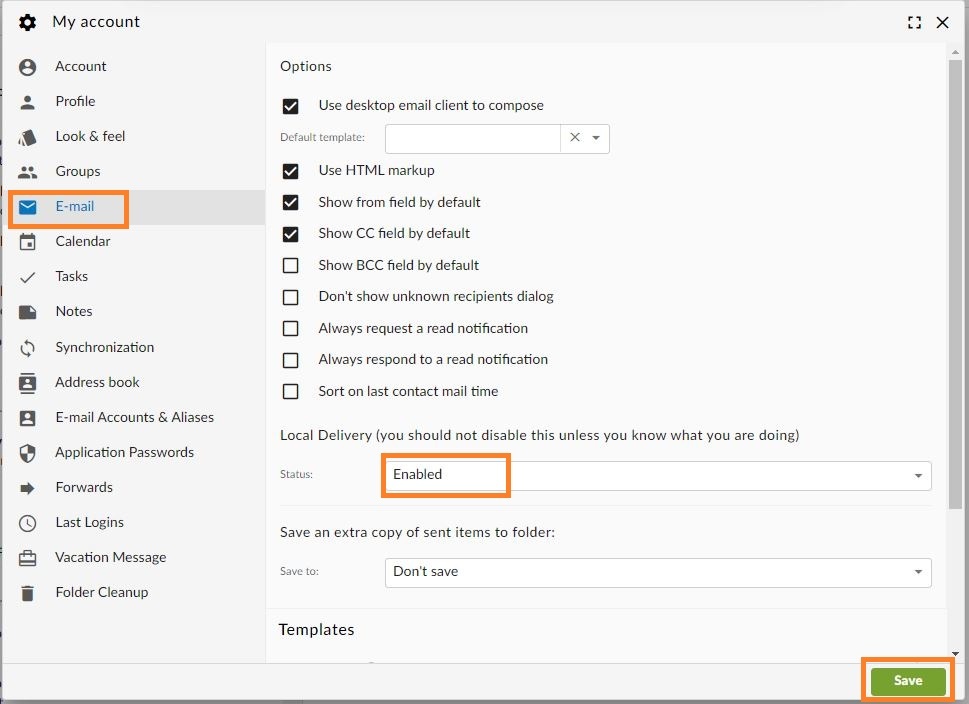
- Change the status to Disabled
- Click on the Save button
Option 2: from the User Panel
- Visit the User Control Panel (https://cp.emailarray.com)
- Log in using your full e-mail address ( user@domain.com ) and current password.
- Click on the Local Delivery icon
- Change the Status to Disabled
- Click on the Update button
This is an extremely useful feature, as it lets you synchronize your most important files to our cloud storage, keeping them safely backed up for up to 30 days. Besides that, it lets you install the ownCloud app on your mobile devices, such as smartphones and tablets, so that your files are easily accessible from wherever you are. There’s more… You can also view and edit your files with an easy to use, visually clear and fast interface and share files with external users, using safe links generated by ownCloud, protect them my password and even set an expiration date for them.
You can even edit PDF, text and Office files using the web interface (https://files.emailarray.com), complete with revisions available for each copy you edited, with the option to roll back to a previous version of the file (up to 30 days).
Enhanced accounts have the advantage of being able to share files between users, including revision control, which details changes made to a file which is accessed by several users. You can even work at one same file at the same time as a colleague and, in real time, owncloud shows you who is editing what (text) with a differentiated color. If you have an existing Enhanced account, please open a ticket so that we can enable Owncloud in your account.
We are offering 5 gigabytes of space on ownCloud FREE to each basic e-mail account and 15 GB for enhanced accounts.
You can easily setup ownCloud to sync files from your local computer/devices (smartphones/tablets) to our ownCloud storage.
Logging in the web interface and downloading the sync client
Our goal with this FAQ is to get your started with the sync client. First of all, access https://files.emailarray.com and login with your e-mail address and respective password.
Authentication credentials are the same as your e-mail account, thanks to our single sign-on technology.
After you first login, ownCloud offers you the desktop client (Windows, OSX or Linux) and apps for both Android and iOS.
We’ll focus on the desktop client. You can download the apps for mobile devices later, accessing from them.
When you click to download the desktop client, you are taken to https://owncloud.org/sync-clients/
In the Sync section (step 2), click on Desktop Clients and choose the version you desire, Windows, Mac or Linux.
Before installing the setup file you downloaded, feel free to take a look around ownCloud’s web interface, create a new text file, edit it online, share the example files with external users (link), etc.
Regarding sharing, you can share files with other users of your domain, by clicking on the “Share” link next to each file and typing in your colleague’s e-mail address. The system will find the address and you must click on it. The file will be shown on the side in “Shared with others” and for the user you shared it with, in “Shared with you”. You can also click on the Share link and then mark the check box “Share Link”, which is a very useful feature that lets you provide a secure link for anyone to be able to download the file, with options such as password protection and expiration of the link.
Regarding deleted files, you can restore them in the “Deleted files” link, on the bottom left. Then, pass your mouse over the file you want to restore and click on the “Restore” link.
Consider watching this short introduction video (5:14 min.): https://www.youtube.com/watch?v=RrAhClhrRAc
Let’s proceed to installing the Sync client on your computer.
Installing sync client on your desktop computer
Install the setup file, choose the Standard installation, click on Next twice and then click on Install.
At the end of the installation, ownCloud will offer the option to load it (checkbox enabled by default).
After it loads, you are requested for the server address. Type in: https://files.emailarray.com and click on Next.
In the username field, type in your full e-mail address, its respective password and click on Next.
ownCloud will now offer to sync all files on the server. If you haven’t used our service before, then you don’t have any of your files stored by us yet, rather just a few test files that ownCloud adds itself to every new account, approximately 3 MB. So you can safely keep the default to sync all files from Cloud to your computer, which is useful even so you can start to understand how it works.
The default directory used by ownCloud is the owncloud folder under your Users folder, on your local computer. You can easily change such location, if needed.
Click on Connect and then two options will be shown.
– Open ownCloud in browser – same as accessing https://files.emailarray.com from your browser. Lets you see all files stored on your cloud storage, even being able to view, create, edit and share files.
– Open local folder – opens your local computer folder which is synced to your cloud storage. If you click here, you will probably notice that the example files added by ownCloud to your account have already been synced to your local ownCloud folder.
Click on Finish.
Sync client settings
Let’s now open ownCloud program, recently installed on your computer again. Below, a few tips on the main sections of the desktop client interface:
– The first tab, which mentions your account, shows you how much space you’re using on cloud storage and lets you add folders for synchronization.
The Add folder to Synchronize button will be dimmed out. If you want to change your local sync directory, you will need to click on the … icon next to current folder used for sync (probably ownCloud folder, as explained before) and click to remove it. Now you will be able to change your local sync directory.
When you add a new directory for sync, you first choose the local directory and, in the next step, where in the remote cloud storage you want to sync that directory with, if the root “owncloud” and all subfolder or only some subfolder(s).
If you choose to sync a local folder to “owncloud root”, you are unable to add more directories to sync, as seen initially. If you set to sync local directories to certain folders in your cloud storage, then you’re able to add several folders for synchronization.
Perhaps the easiest, is the default, of syncing your users ownCloud local folder with the remote owncloud root and store all files you want to sync, in your local owncloud directory, even moving existing directories to here.
If there are files/folders you don’t want to sync, you have to specify them in the General tab, under Edit ignored files. For example, in your local owncloud folder you don’t want to sync files in the subfolder games. Simply add a new file to ignore and type in games. You will see, in the Activity Manager tab, that it will be bypassed.
Edit ignored files is also useful if there are folders/files in ownCloud that you don’t want to sync back to your local computer, all you have to do is specify their names.
– Under Activity, ownCloud shows you status of files synced to/from your cloud storage.
– In the General tab, you might want to mark the checkbox to Launch on System Startup, so that ownCloud will always be enabled on your computer, sycing files from/to your cloud storage.
Apps for mobile devices
In the case of Android, ownCloud’s app has a small cost of US$ 0,99. An alternative is a free app called ocloud for owncloud, which has been tested by us and works fine.
For iOS, the paid official app costs also US$ 0,99. The only free alternatives we found for iOS are developed by universties that use ownCloud, such as South Oregon University’s app (search for “SOU owncloud” in the app store), which does work if you specify our host *https://files.emailarray.com*.
We do recommend, however, the paid official app and can’t be responsable for the apps provided by third party.
]]>- Go to https://cp.emailarray.com
- Login using your full e-mail address ( user@domain.com ) and current password.
- Click on the Folders icon
- Click on Edit icon (pencil) next to the folder you wish to share
- Click on the New Share button
- Select the user you wish to give permission to and the permissions users will have
- Click on the Share button
By default, your own account has full permission on the folder you are editing. Make sure not to erase your own permissions or you will lose access to that folder
Removing permission on a folder
- Go to https://cp.emailarray.com
- Login using your full e-mail address ( user@domain.com ) and current password.
- Click on the Folders icon
- Click on the Edit icon (pencil) next to the folder you wish to edit shares
- Click on the “–” icon (minus sign) next to the user you wish to remove the permissions for
- Go to the User Panel: https://cp.emailarray.com
- Login using your full e-mail address ( user@domain.com ) and current password.
- Click on the Track Deliveries button
By default, after clicking on the Search button, you will see the list of e-mails that you sent during the current day and which were delivered. You need to click on the arrow next to each delivery’s date/subject to view details.
You can alter your search criteria and filter out by: Temporarily Rejected Messages ( for example, user is over quota ), Permanently Rejected Messages ( invalid mailbox, blacklisted, etc. ) or All Messages. You can also specify the range of dates to search for while also specifying the e-mail address where you sent it.
Optionally, you can mark the checkbox next to Send me a monthly PDF report, to receive such reports via e-mail.
You can review Remote Delivery data for up to 60 days in the past
Here’s an example of a successful delivery:
2014-10-27 15:24:35 – test
Sent From: tests@emailarray.com
Sent To: “testsemailarray@gmail.com”
Recipient delivery status: Message accepted
Message delivery status: 74.125.193.26 accepted message.Remote host said: 250 2.0.0 OK 1414437875 x11si18095722icx.68 – gsmtp
In this case, email was delivered to the remote server who answered with some SMTP codes initiated by the number 2, indicating that such e-mail is in the queue to be delivered to the recipient. It does not mean the recipient received or read the email, but usually that should occur, since the remote server did receive it and queued it to be delivered, unless recipient’s mail server has some technical problem.
If our server is unable to connect to the recipient server, it will try to send your e-mail for 7 days, after which it will bounce back an error message indicating that the email could not be sent. In these cases, a temporary rejection error is presented, such as the example below:
From and To: may show as “null”, since our server did not even connect to the recipient server
Message delivery status:Sorry, I wasn’t able to establish an SMTP connection. (#4.4.1)
There isn’t an always guaranteed way to know that the recipient read an e-mail. Some email clients, such as Thunderbird, Windows Live Mail and our WebMail are able to send a delivery receipt, which can be granted if the recipient decides to do so. On the other hand, some clients such as Thunderbird and Outlook are able to send a delivery receipt, to verify if an e-mail was received by a recipient server, however, many servers don’t grant such confirmation. Still, some services do offer a way to track if a user opened an email, such as the free WhoReadMe![]() or ReadNotify
or ReadNotify![]() (paid), sometimes criticized since they do track if an email was opened through an image/link embedded in it. Such services depend on adding their domain at the end of the recipient’s e-mail address, so your e-mail passes through their server, which sends to the destination and tries to verify delivery.
(paid), sometimes criticized since they do track if an email was opened through an image/link embedded in it. Such services depend on adding their domain at the end of the recipient’s e-mail address, so your e-mail passes through their server, which sends to the destination and tries to verify delivery.