Here’s the step by step for setting up an IMAP account on Android’s native mail app.
- Press the device’s Menu button.
- Tap Settings.
- Click on Accounts
- Click on Add account.
- Click on Email.
- Enter your full e-mail address and password.
- Select if you want to send e-mails using this account by default
- Click on Next
- Click Manual setup.
- In account type, choose IMAP account.
- Android will automatically use imap.yourdomain.com and smtp.yourdomain.com as hosts, which is OK
- Username field has to be changed to your FULL e-mail address
- Click on Next 3 times in a row, note that on the last page you can setup specific details such as interval for checking mail
- On the last page, Android gives you the option to change the friendly name and also Your name, as it appears to recipients.
- Click on OK to finalize the procedure.
If you want to setup IMAP with SSL, after clicking on Add account > Email and typing in your e-mail and password, fill out the hostnames as per below.
- IMAP server – imap.emailarray.com
- Security type – SSL or SSL/TLS
- Port 993
- SMTP Server – smtp.emailarray.com
- Security type – SSL or SSL/TLS
- Port – 465
Note: IMAP is preferred over POP. If you want to set up the account as POP, you have to set it up manually. IMAP is a protocol made to support several devices accessing one same account, with all folders synced at our server, which also guarantees that our backups will be executed.
If you have an Enhanced mailbox, you can use ActiveSync, to not only sync e-mails, but also contacts and calendars.
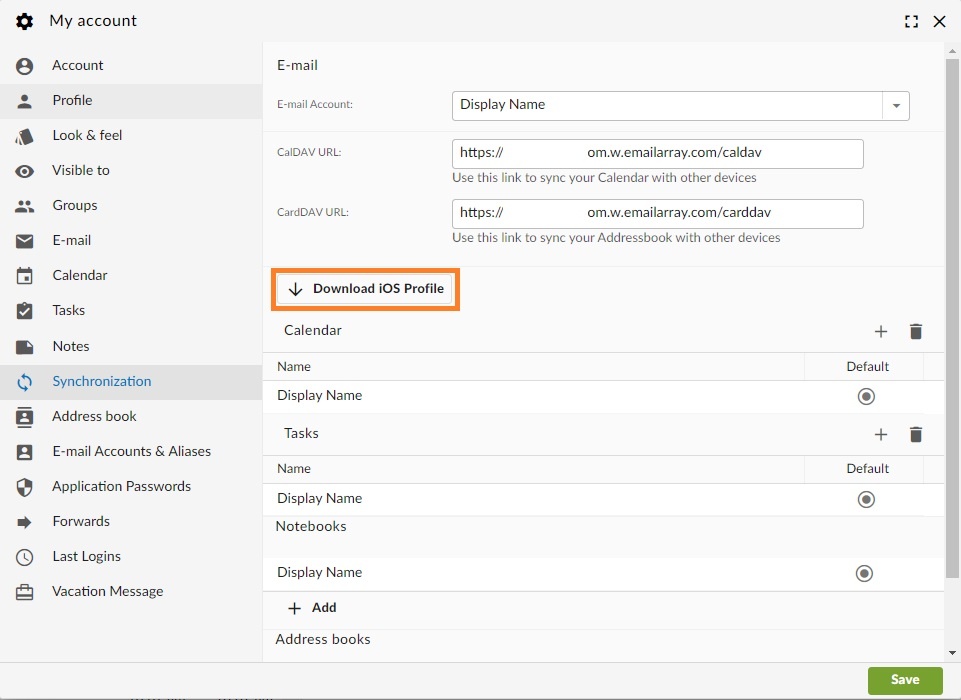
You can log in to the GroupOffice Webmail and download a profile to automatically setup the e-mail as IMAP. The profile will include calendars and contacts if you have an Enhanced mailbox.
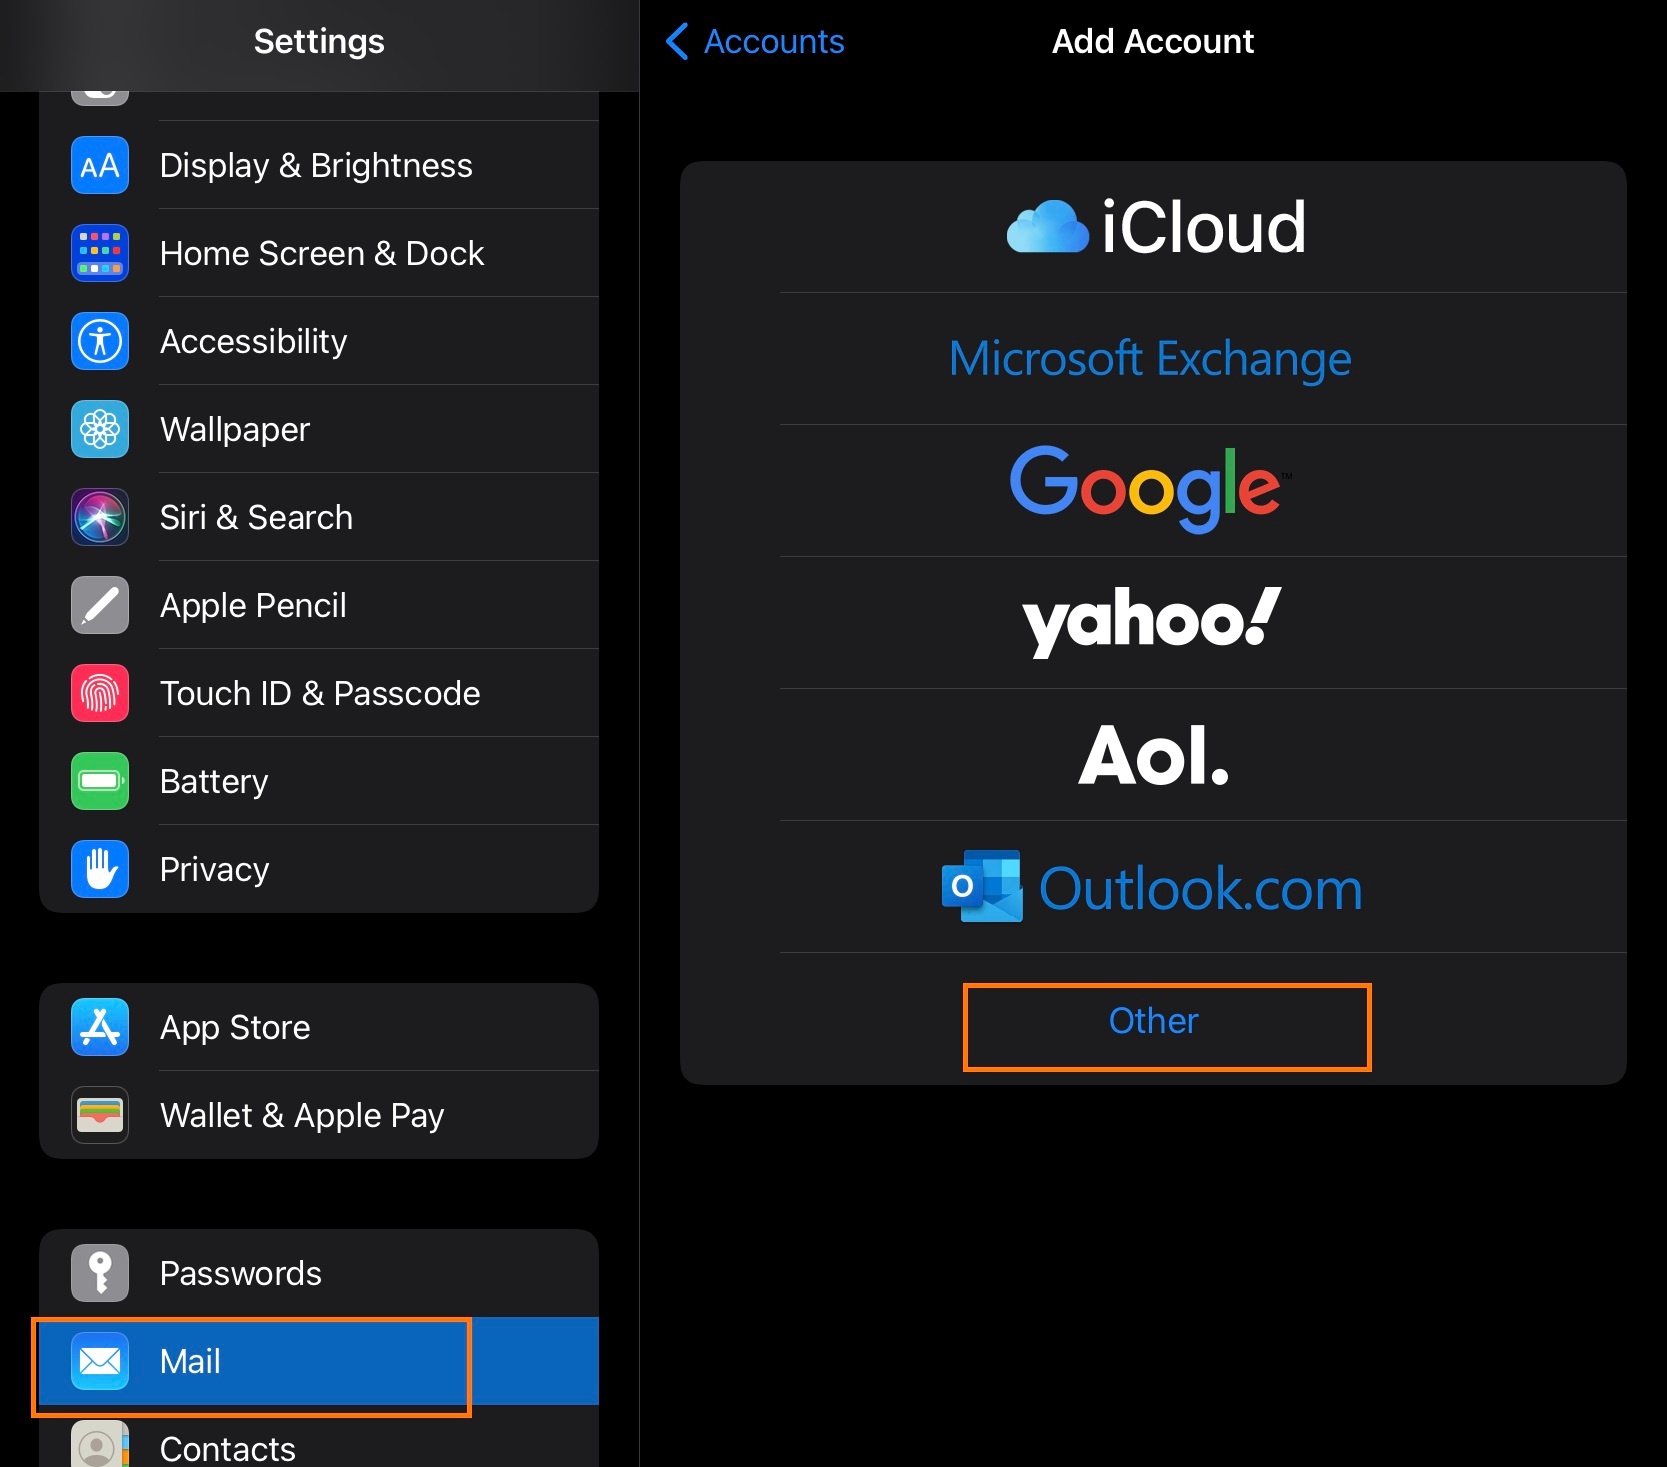
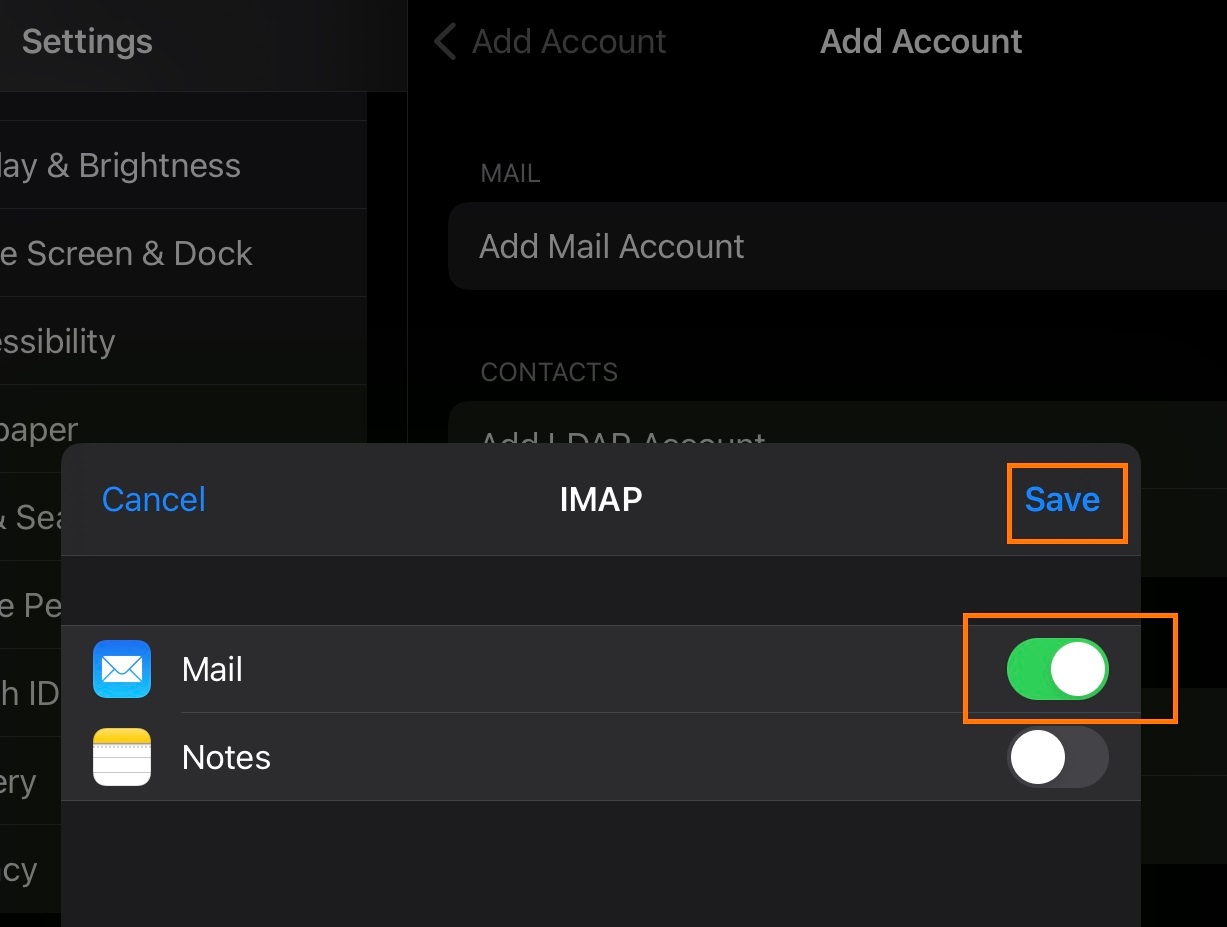
Here’s the step by step for setting up an IMAP account on iOS.
- Click on Settings
- Click on Mail, Contacts, Calendars
- Click on Add Account
- Click on Other
- Click on Add Mail Account
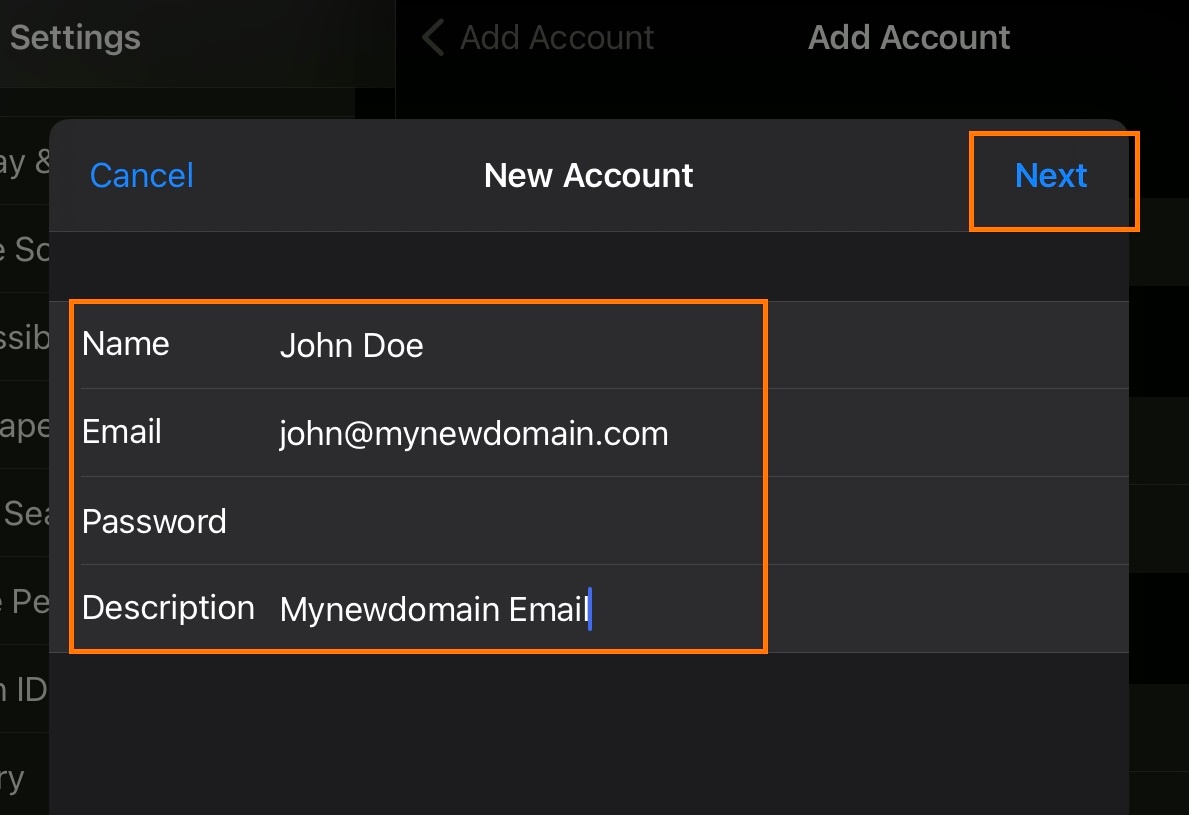
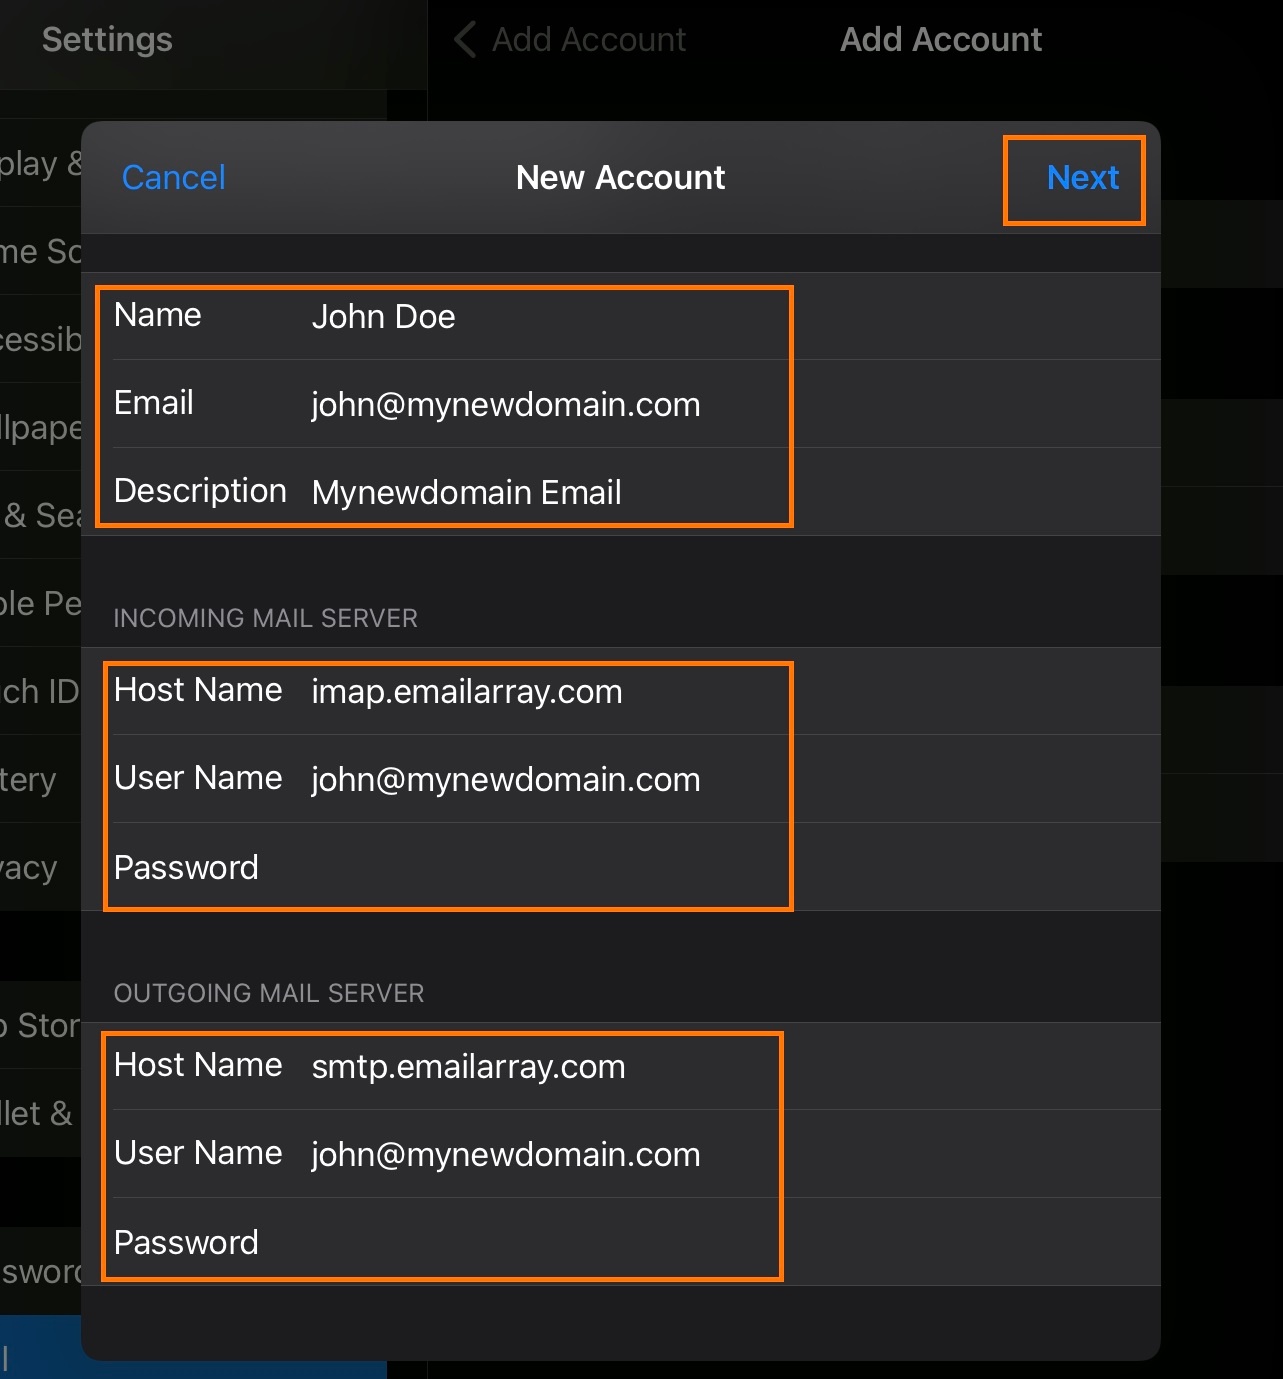
- Inform the following
- Name – The display name you want on your outgoing email
- Email – Your full e-mail address
- Password – Your e-mail password
- Description – A description for your account
- Click on Next
- IMAP is selected by default
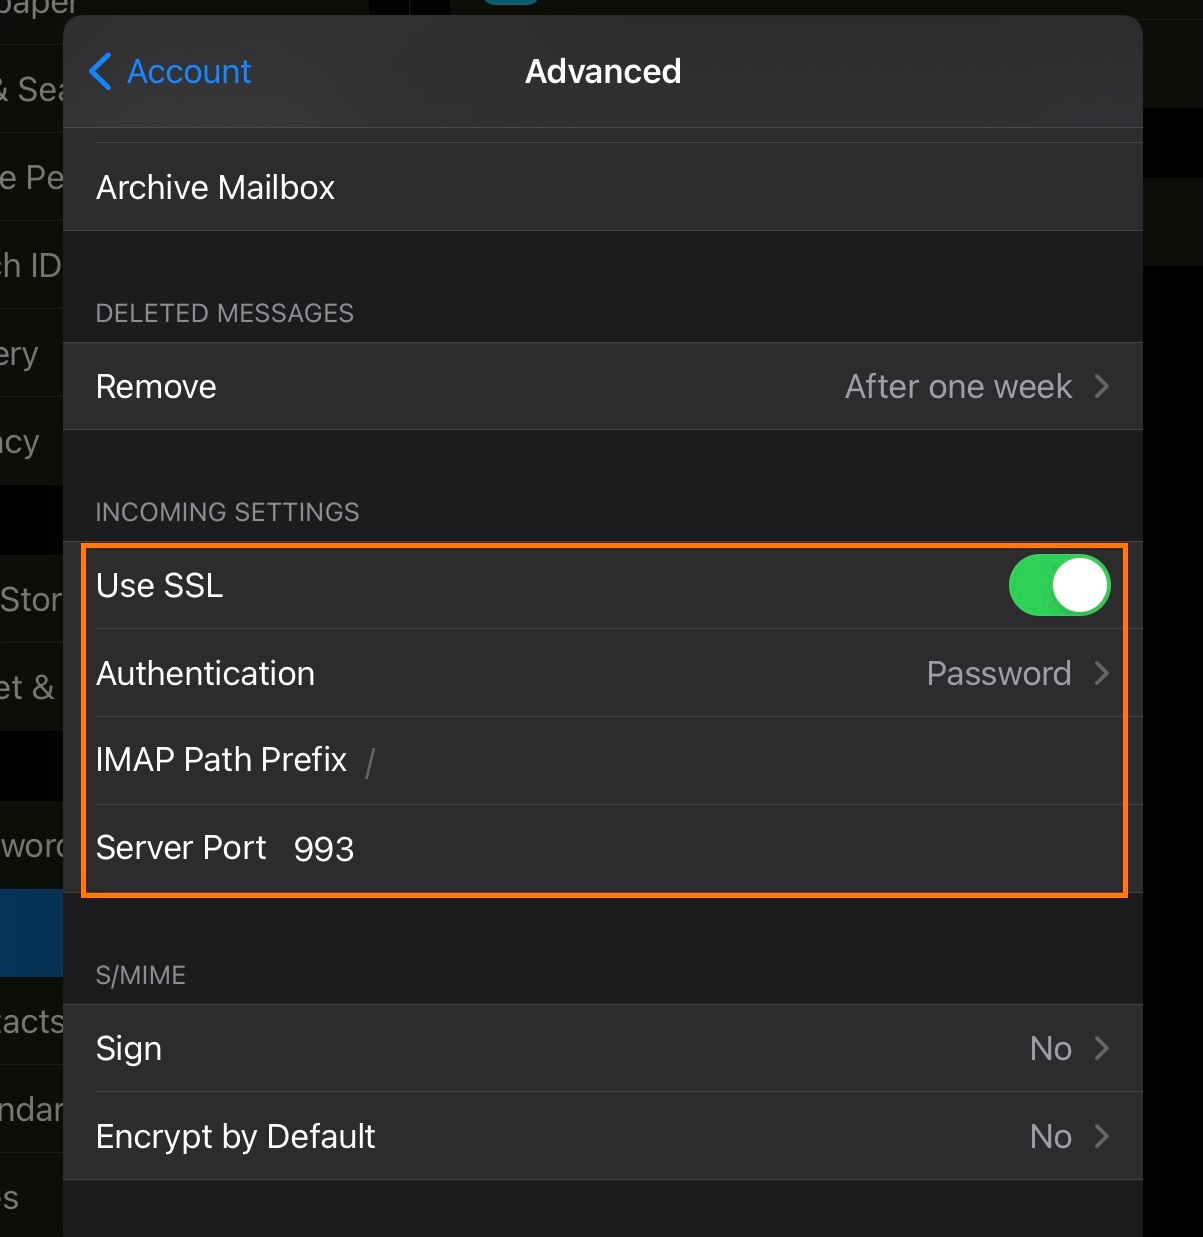
- Under Incoming Mail Server, enter as below:
- Host Name – imap.emailarray.com
- User Name – Your full e-mail address
- Password – Your password
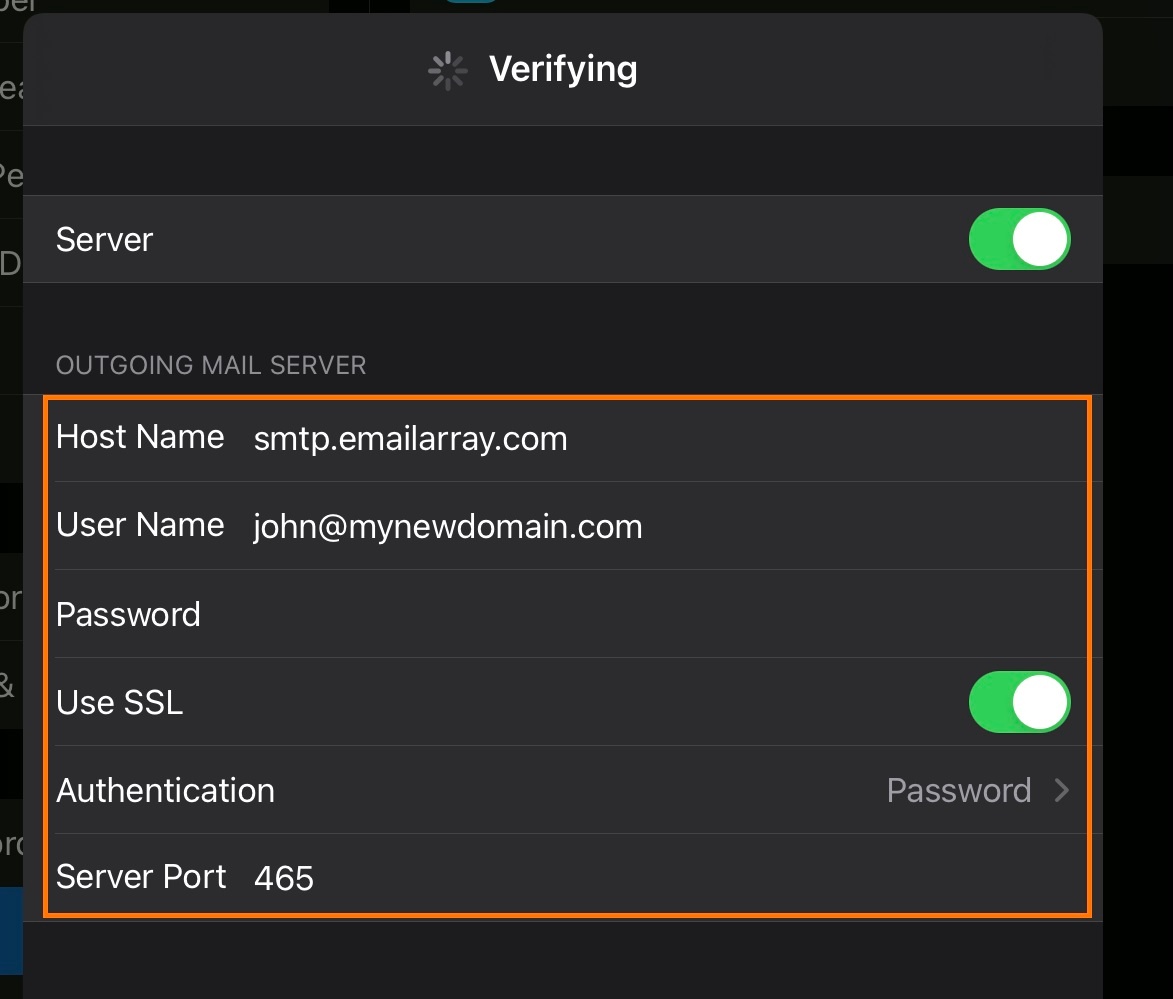
- Under Outgoing Mail Server, enter as below:
- Host Name – smtp.emailarray.com
- User Name – Your full e-mail address
- Password – Your password
- Click on Next
- Click on Save
Note: IMAP is preferred over POP. If you want to set up the account as POP, you have to set it up manually. IMAP is a protocol made to support several devices accessing one same account, with all folders synced at our server, which also guarantees that our backups will be executed.
Example setup for iOS:
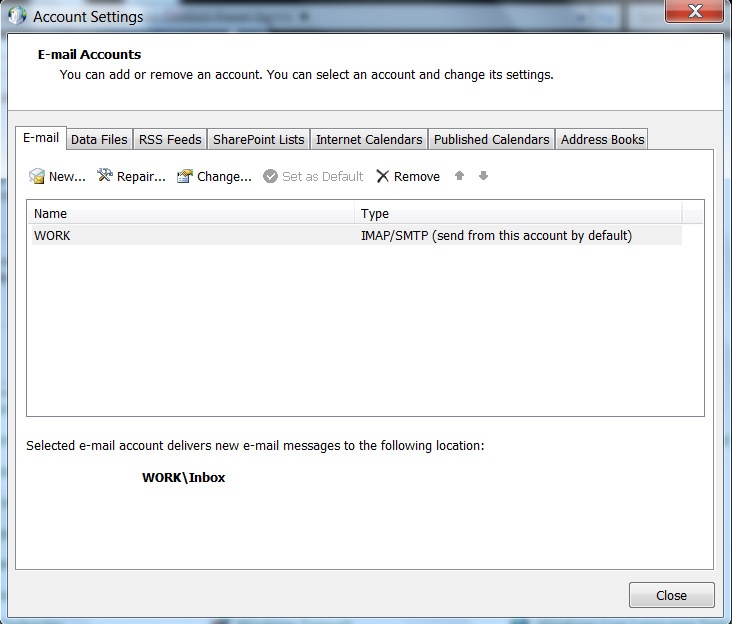
Below, step by step tutorials according to Outlook version used, which you can usually check when opening Outlook or in the Help menu/About. There’s also a web site with generic Outlook setup which can be useful, so you can view screen shots.
Also notice that if this is the first time you open Outlook since its install, a window will immediately pop up asking you to setup your email account. Click yes and proceed and follow our instructions starting with section in which you start typing in your account data.
Finally, as per our tests, sent items and trash are automatically saved in IMAP folders, except in older Outlook 2003. Nonetheless, information about this is available for Sent Items and Trash, specially useful if your Outlook is not in English and you want to manually define folders used for these base folders. Notice that our WebMail automatically decodes the english default names (Sent, Trash, Drafts, Spam) so that it shows them in the language in which you accessed WebMail. In some cases, however, it might be required to change folder mappings in WebMail, if Outlook does not do this conversion automatically, besides mapping the localized names in your Outlook.
Outlook 2013/2010:
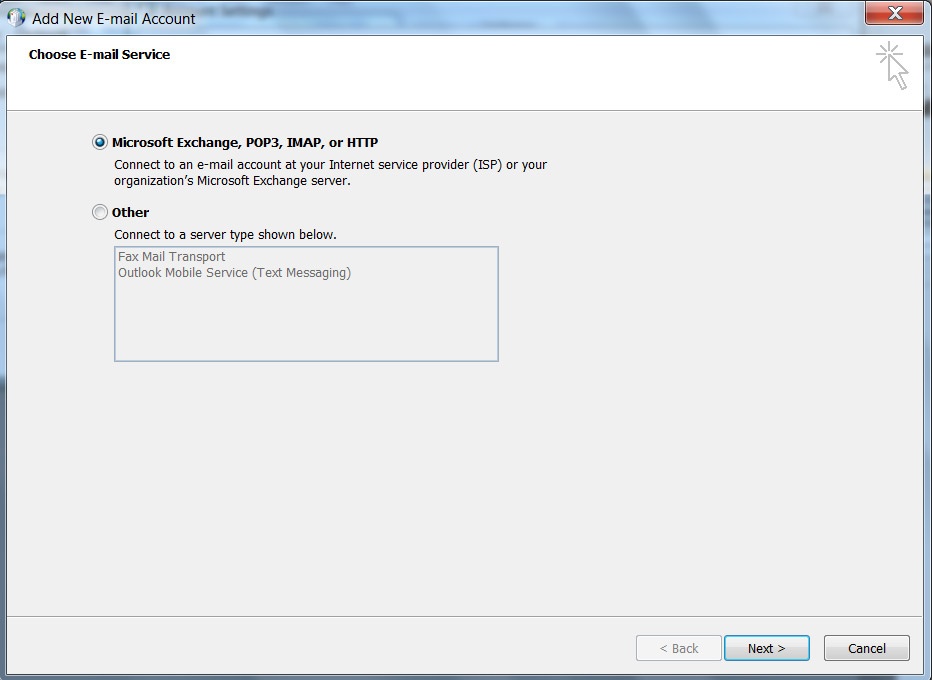
- Click on the File menu and it shall show you the Info tab
- Click on + Add Account
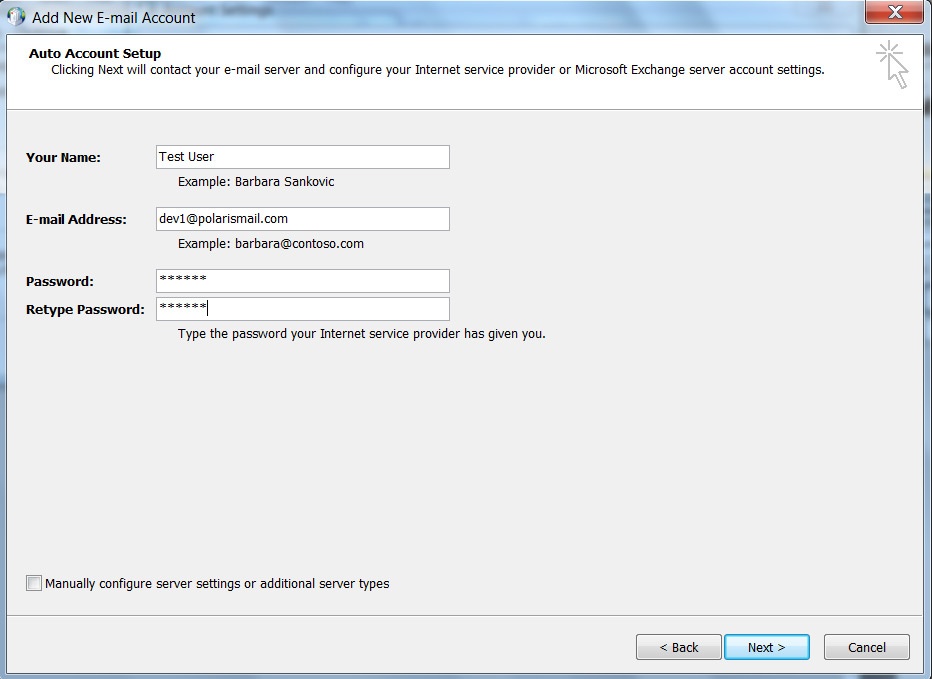
- Type in your full name, e-mail address, and password and click on Next
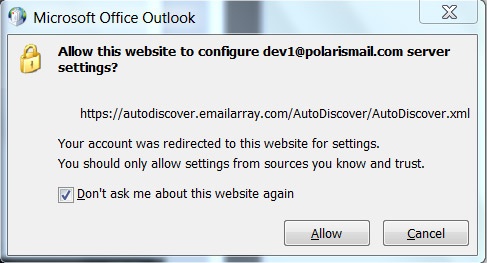
- Click on Allow when asked about autodiscover.xml
- Click on Finish
Note that Outlook will automatically setup the account as IMAP. If you want to set up the account as POP, you have to setup the account manually. IMAP is recommended, as it´s a protocol made to support several devices accessing one same account, with all folders synced at our server, which also guarantees that our backups will be executed.
Outlook 2007:
Go to Tools -> Account Settings and click on New
Click on Next
Enter the user’s full name, his e-mail address and password. Click on Next
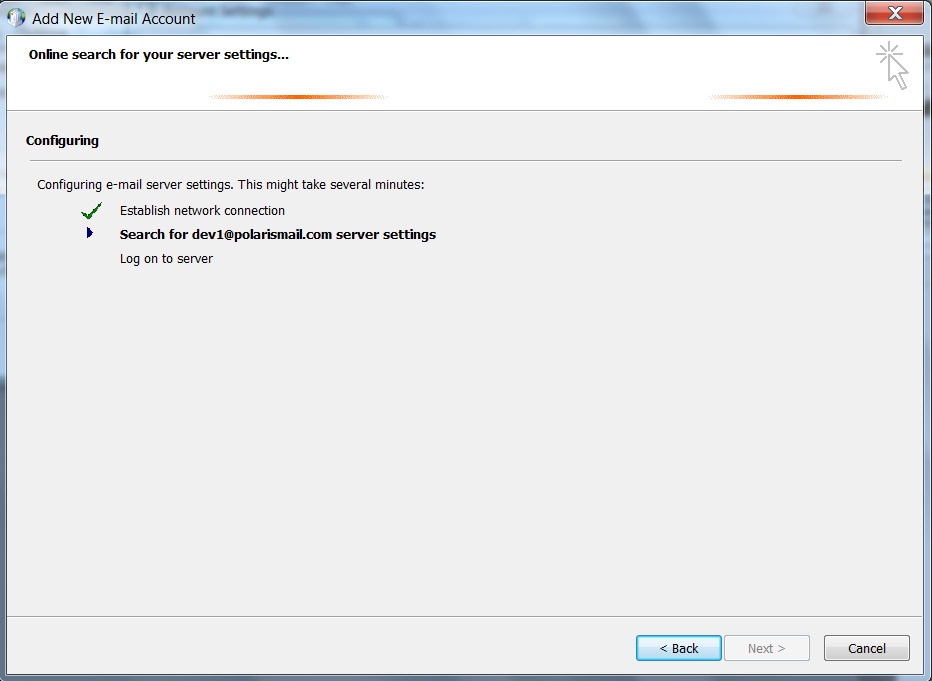
Outlook will search for the web service…
Allow autodiscover.emailarray.com/AutoDiscover/AutoDiscover.xml to configure the client.
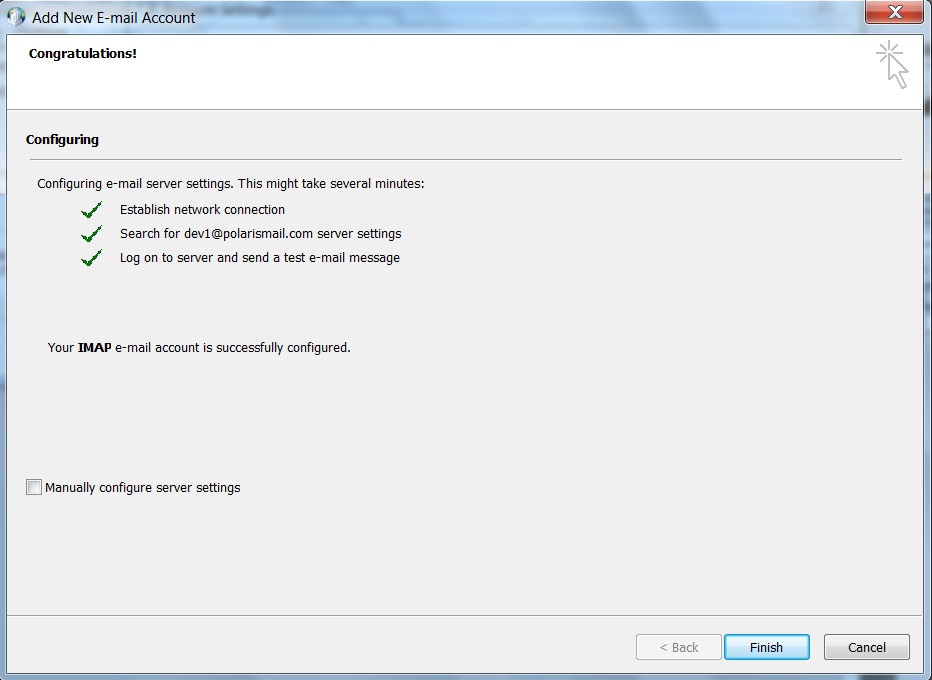
The account is now configured. Click on Finish
Click on Tools -> Account Settings -> Account Actions -> Add Mail Account.
If your menus on the top are hidden, click on the ALT key to show them, or access Account Settings by clicking on the radiator icon, on the top right of the interface, then Options -> Account Setting -> Account Actions -> Add Mail Account.
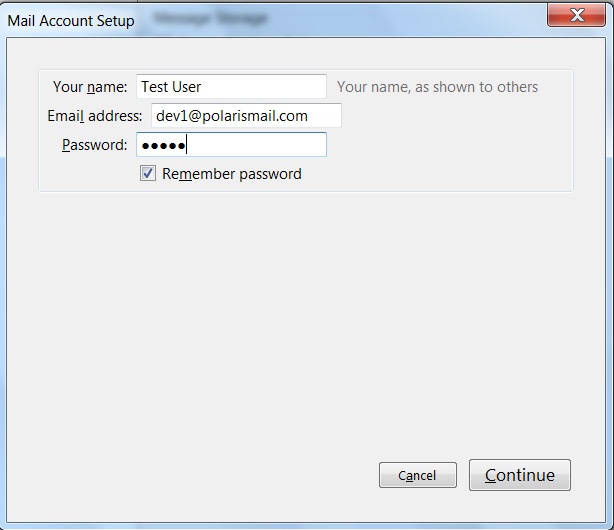
Enter the user’s full name, e-mail address and password:
Click on Continue. Thunderbird will automatically find the proper server names.
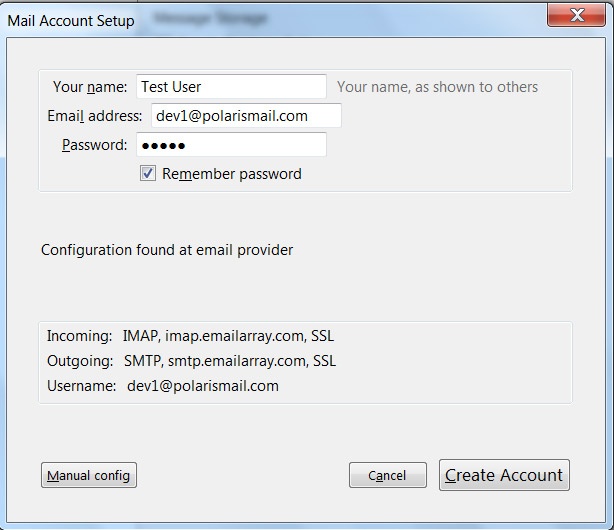
Click on Create Account
Note: Thunderbird will automatically setup the account as IMAP. If you want to set up the account as POP, you have to setup the account manually. IMAP is recommended, as it´s a protocol made to support several devices accessing one same account, with all folders synced at our server, which also guarantees that our backups will be executed.
If you are familiar with this setup, you can click here for our web page on what server names and ports to use.
For the SMTP settings, remember to always mark the option to “Require authentication” (sometimes referred to as “My server requires SMTP authentication”).
Also note that IMAP is recommended rather than POP, as it´s a protocol made to support several devices accessing one same account, with all folders synced at our server, which also guarantees that our backups will be executed.