Warning: preg_match(): Unknown modifier '-' in /home/akl1986/public_html/support/wp-content/plugins/redux-framework/redux-core/inc/extensions/metaboxes/class-redux-extension-metaboxes.php on line 783

Warning: preg_match(): Unknown modifier '-' in /home/akl1986/public_html/support/wp-content/plugins/redux-framework/redux-core/inc/extensions/metaboxes/class-redux-extension-metaboxes.php on line 783

Warning: preg_match(): Unknown modifier '-' in /home/akl1986/public_html/support/wp-content/plugins/redux-framework/redux-core/inc/extensions/metaboxes/class-redux-extension-metaboxes.php on line 783

Warning: preg_match(): Unknown modifier '-' in /home/akl1986/public_html/support/wp-content/plugins/redux-framework/redux-core/inc/extensions/metaboxes/class-redux-extension-metaboxes.php on line 783

Warning: preg_match(): Unknown modifier '-' in /home/akl1986/public_html/support/wp-content/plugins/redux-framework/redux-core/inc/extensions/metaboxes/class-redux-extension-metaboxes.php on line 783

Warning: preg_match(): Unknown modifier '-' in /home/akl1986/public_html/support/wp-content/plugins/redux-framework/redux-core/inc/extensions/metaboxes/class-redux-extension-metaboxes.php on line 783

Warning: preg_match(): Unknown modifier '-' in /home/akl1986/public_html/support/wp-content/plugins/redux-framework/redux-core/inc/extensions/metaboxes/class-redux-extension-metaboxes.php on line 783

Warning: preg_match(): Unknown modifier '-' in /home/akl1986/public_html/support/wp-content/plugins/redux-framework/redux-core/inc/extensions/metaboxes/class-redux-extension-metaboxes.php on line 783

Warning: Cannot modify header information - headers already sent by (output started at /home/akl1986/public_html/support/wp-content/plugins/redux-framework/redux-core/inc/extensions/metaboxes/class-redux-extension-metaboxes.php:783) in /home/akl1986/public_html/support/wp-includes/feed-rss2.php on line 8
FileZilla Guide – AKLWEB HOST LLC Support Center https://support.aklwebhost.com Wed, 08 Jul 2020 22:43:05 +0000 en-US hourly 1 https://wordpress.org/?v=6.4.4 How to fix failed to retrieve directory listing error in FileZilla FTP https://support.aklwebhost.com/knowledgebase/how-to-fix-failed-to-retrieve-directory-listing-error-in-filezilla-ftp/ https://support.aklwebhost.com/knowledgebase/how-to-fix-failed-to-retrieve-directory-listing-error-in-filezilla-ftp/#comments Wed, 08 Jul 2020 22:43:05 +0000 https://support.aklwebhost.com/?post_type=manual_kb&p=3242 You can easily fix this error by going into the site manager and adjusting your connection details to use plain FTP. Follow these steps to fix the problem:

  1. In FileZilla, click on “File” menu and choose “Site Manager”
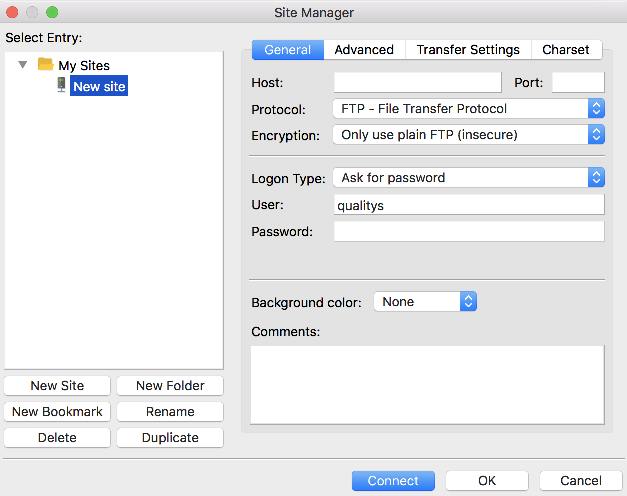
  2. Add the site or server you want to connect to if it’s not already in site manager.
    1. Add hostname
    2. change encryption to “only use plain FTP”
    3. Change logon type “Normal”
    4. Enter username/password.
    5. Click on Connect to continue

If the problem still persists, please disable your firewall then try once more! If it still fails,  here is what you need to do:

  • Open Filezilla, go to Edit -> Settings
  • Click on Connection -> FTP: Choose Active
  • Click on Connection -> FTP -> Active Mode: Select “Ask your operating system for the external IP address”
  • Click on Connection -> FTP -> Passive Mode: Choose Fall Back to Active Mode
  • Press OK.

Try connecting to your FTP again!

]]>
https://support.aklwebhost.com/knowledgebase/how-to-fix-failed-to-retrieve-directory-listing-error-in-filezilla-ftp/feed/ 1
Uploading files using FileZilla https://support.aklwebhost.com/knowledgebase/uploading-files-using-filezilla/ https://support.aklwebhost.com/knowledgebase/uploading-files-using-filezilla/#respond Mon, 25 Nov 2019 12:55:01 +0000 https://support.aklwebhost.com/?post_type=manual_kb&p=2099

This tutorial assumes you already have FileZilla running on your computer, and are connected to a remote server.

Now let’s learn how to upload or transfer a file to a remote server.

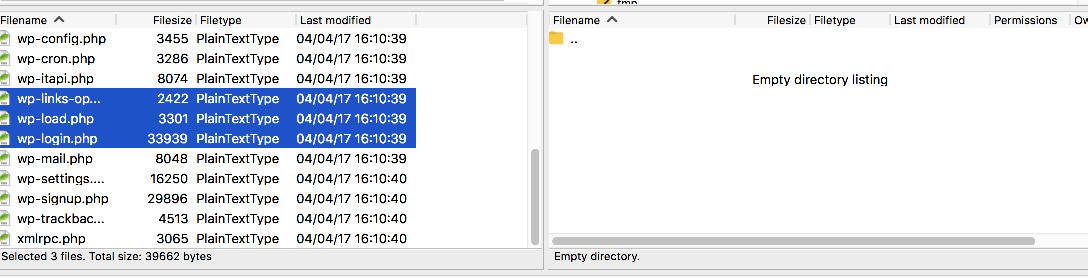
1) Select a few files you would like to upload.  To select multiple files press CTRL on your keyboard.

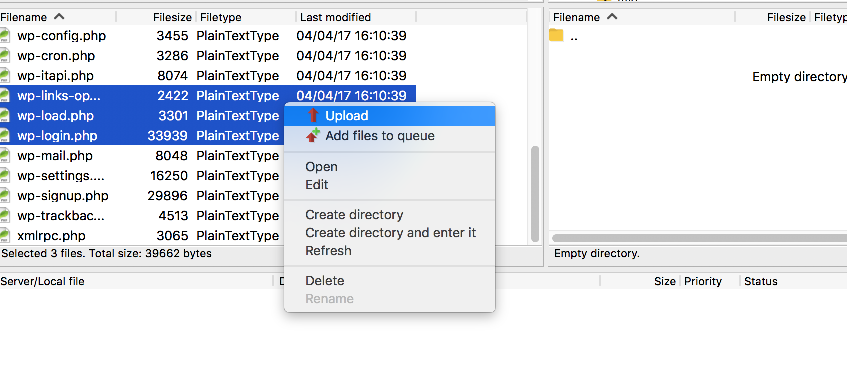
2) Right click the selected files. Then click Upload.

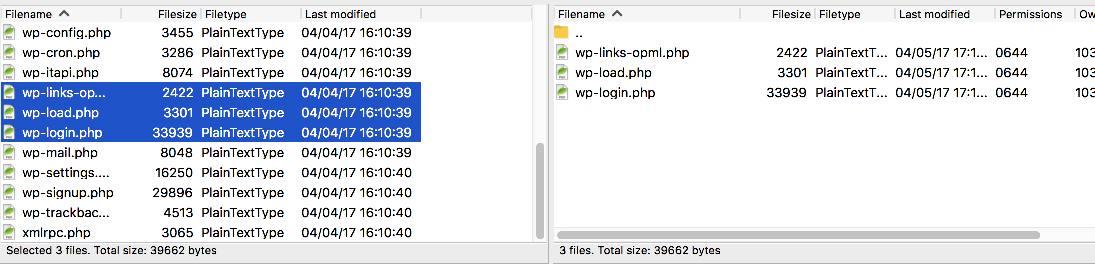
That’s it! The files have been uploaded to the remote server, and can be seen here.

Now let’s learn how to download a file, first let’s delete one of the files from our local computer that we previously uploaded.

3) Right click on the file wp-load.php and choose delete.

The file has now been deleted.  Let’s go ahead and download it.

4) Right click on the file, mrteng.log.

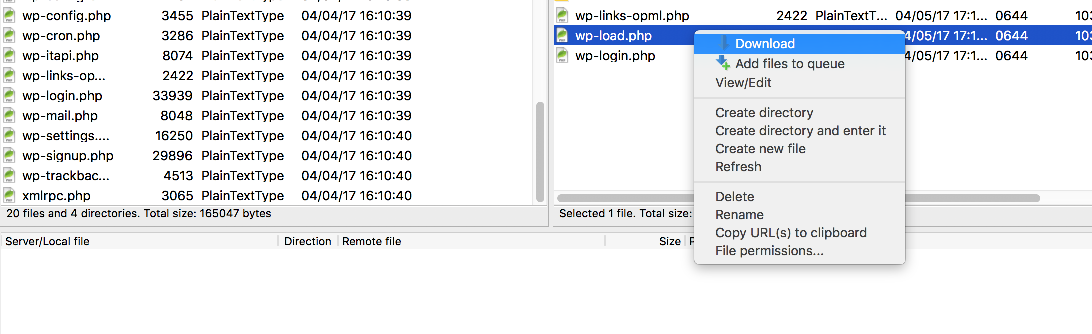
5) Then select Download.

That’s it!  The file has been downloaded and can be seen here.

This is the end of the tutorial.  You now know how to upload or transfer files to and from a remote server.

]]>
https://support.aklwebhost.com/knowledgebase/uploading-files-using-filezilla/feed/ 0
Managing files/folders in FileZilla https://support.aklwebhost.com/knowledgebase/managing-files-folders-in-filezilla/ https://support.aklwebhost.com/knowledgebase/managing-files-folders-in-filezilla/#respond Mon, 25 Nov 2019 12:54:37 +0000 https://support.aklwebhost.com/?post_type=manual_kb&p=2097

This tutorial assumes you already have FileZilla running on your computer, and are connected to a remote server.

Now let’s learn how to manage files and folders in FileZilla.

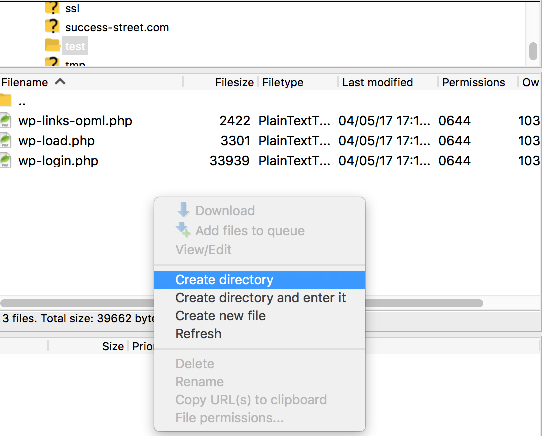
1) Right click anywhere here in the remote server window. Then click Create directory.

2) Enter a name for the new folder here. Then click OK.

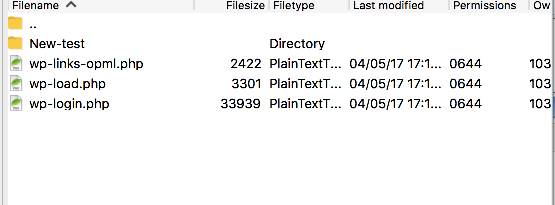
That’s it!  The new folder has been created and can be seen here.

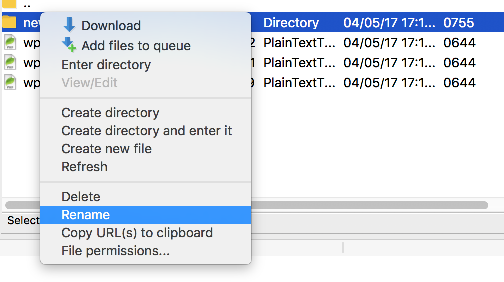
3) Now let’s rename the folder… right click the new folder name. Select Rename.

4) Then enter the new name of the folder.

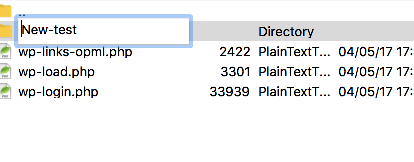
The folder has been renamed.

5) Now let’s delete the folder…  right click the folder name, then choose delete.

That’s it!  The folder has been deleted.  Now let’s learn how to change file permissions.

6) Right click the file wp-load.php file name. Select File Permissions.

7) Now let’s change some of the permissions or attributes of this file.

8) When finished, click OK.

That’s it! Permissions for the file have been successfully changed.

This is the end of the tutorial.  You should now know how to manage your files and folders in FileZilla, including creating new folders, renaming them, deleting name, and changing file permissions.

]]>
https://support.aklwebhost.com/knowledgebase/managing-files-folders-in-filezilla/feed/ 0
Configuring your website in FileZilla https://support.aklwebhost.com/knowledgebase/configuring-your-website-in-filezilla/ https://support.aklwebhost.com/knowledgebase/configuring-your-website-in-filezilla/#respond Mon, 25 Nov 2019 12:53:33 +0000 https://support.aklwebhost.com/?post_type=manual_kb&p=2095

This tutorial assumes you already have FileZilla running on your computer, but not connected to a remote server.

Now let’s learn how to configure a website in FileZilla.

1) Select the File menu.

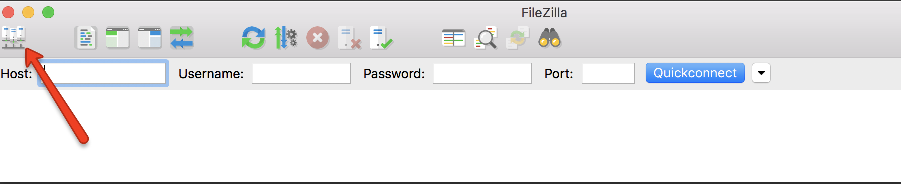
2) Then select Site Manager.

3) Click New Folder.

4) Enter a name for the new folder here.

Now let’s configure a new site inside this new folder.

5) Click New Site.

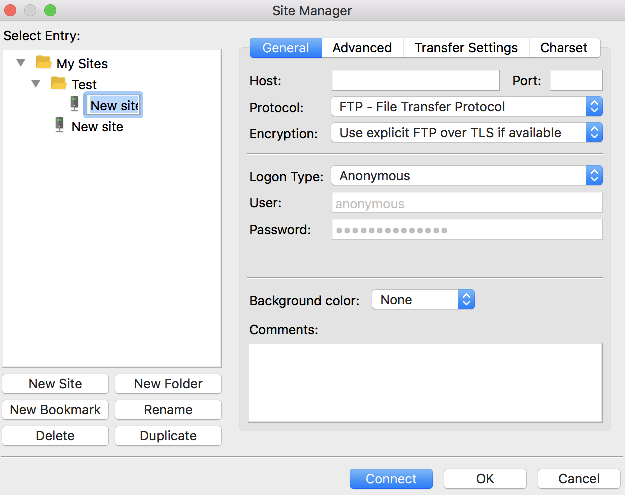
6) Enter a name for the new site here.

7) Enter the name of the Host here.

8) Select Normal for the logon type.

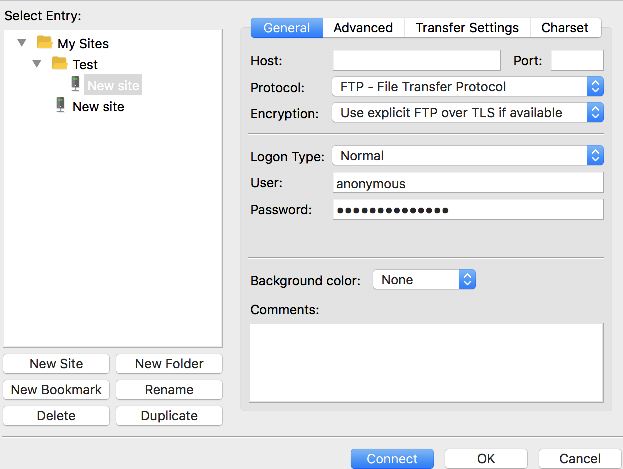
9) Enter the User name here.

10) Enter the Password here. Then click Connect.

That’s it!  We are now connected the remote server and the login details are saved for quicker connections in the future.

This is the end of the tutorial.  You should now know how to configure a website in FileZilla, for the purposes of establishing an FTP connection.

]]>
https://support.aklwebhost.com/knowledgebase/configuring-your-website-in-filezilla/feed/ 0