
2) When you will into your client area screen, you will see SERVICES tab click on that.

3) After get into SERVICES tab you will find your Cloud VM status, click on GREEN active button.

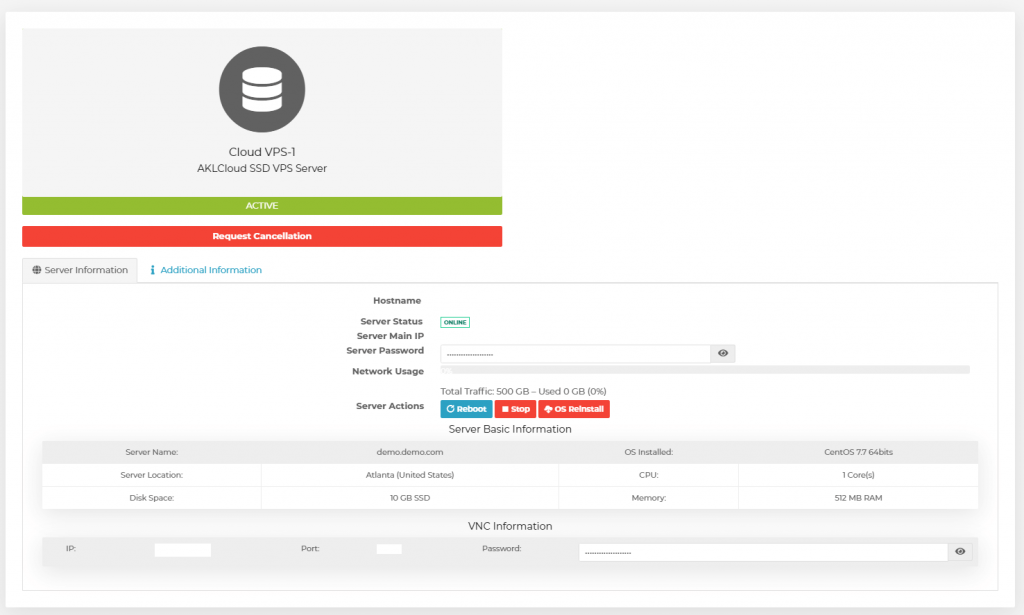
4) When you click on Active Status button you will find all the information of your Cloud VM.
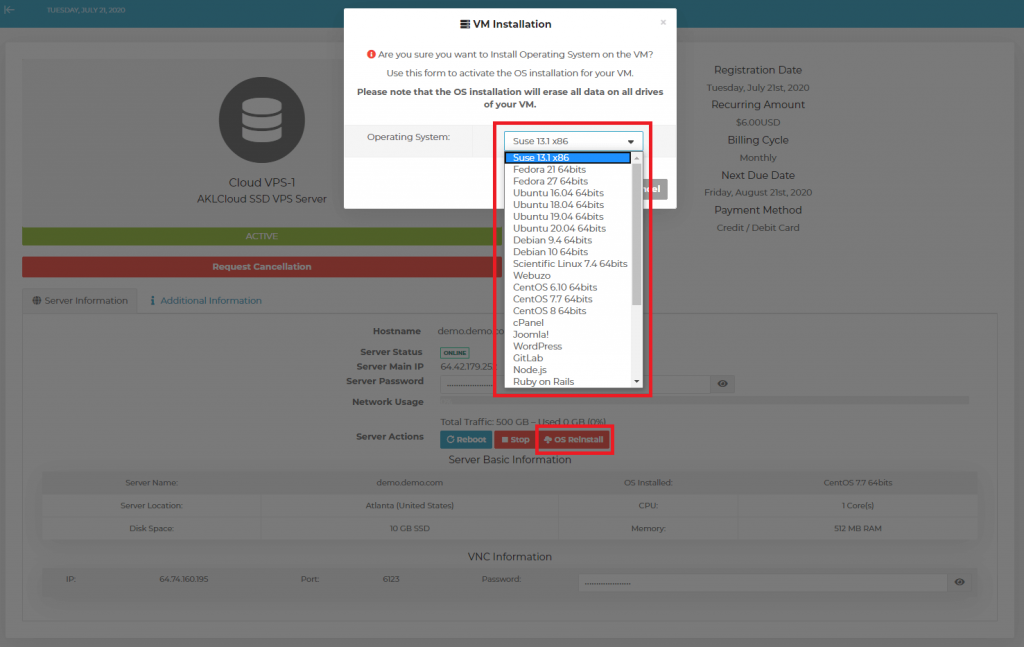
5) When Cloud VM Information page will be open you will see OS Reinstall button click on it and a popup will be come out, select your OS that you want to install on your Instance and hit confirm GREEN button to start your OS installation.
2) When you will into your client area screen, you will see SERVICES tab click on that.
3) After get into SERVICES tab you will find your Cloud VM status, click on GREEN active button.
4) When you click on Active Status button you will find all the information of your Cloud VM.
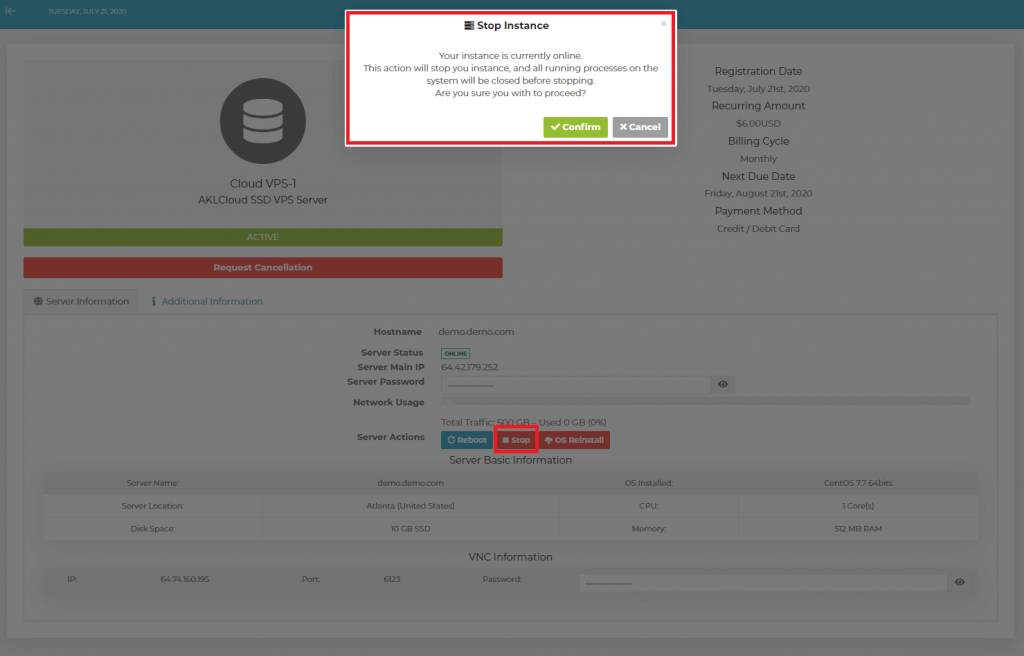
5) When Cloud VM page will be open you will see STOP button click on it and a popup will be come out, click on confirm GREEN button to stop your Instance.
2) When you will into your client area screen, you will see SERVICES tab click on that.
3) After get into SERVICES tab you will find your Cloud VM status, click on GREEN active button.
4) When you click on Active Status button you will find all the information of your Cloud VM.
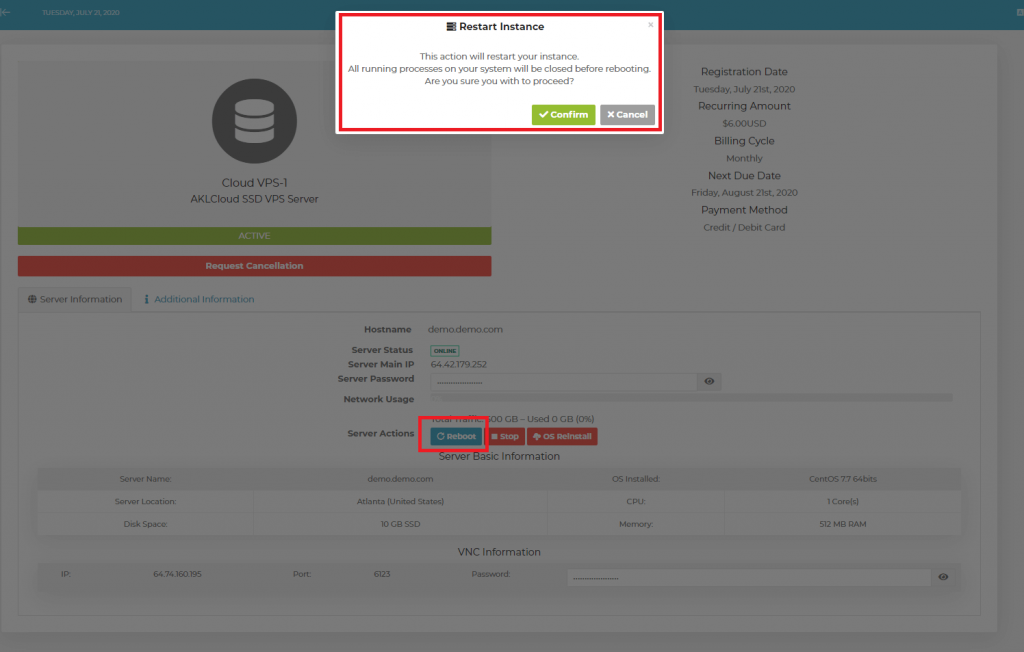
5) When Cloud VM Information page will be open you will see Reboot button click on it and a popup will be come out, click on confirm GREEN button to restart your Instance.
2) When you will into your client area screen, you will see SERVICES tab click on that.
3) After get into SERVICES tab you will find your Cloud VM status, click on GREEN active button.
4) When you click on Active Status button you will find all the information of your Cloud VM.
For our VPS packages that do not include the web hosting control panel cPanel or Plesk, we currently offer semi-managed support. This means that our administrators will handle any hardware, operating system or basic configuration issues which my arise with your server. Below are some examples that our administrators may assist with but are not limited to:
- Load issues or sluggishness.
- Basic website related issues (Internal Server Errors, 404s, etc).
- Network related problems.
- Failure of server to restart.
- Hardware failure.
- Package install via package manager (yum,rpm).
- Basic named configuration for 1 domains.
- Troubleshooting pre existing configurations.
- Basic task automation.
- Basic firewall setup/troubleshooting. (iptables)
- And more.
Order Addons for VPS Server
- Additional Ram : ?
- Additional DiskSpace : ?
- Additional Bandwidth : ?
- Additional vCPU : ?
As an alternate option, you can always submit a ticket from the client area to order add-ons. On receipt of your support ticket, we will send you an invoice according to the resource type, resource amount and chosen billing cycle. Once you make the payment, we will upgrade your VPS server with the purchased add-on. You can check all add-ons being offered with VPS and their price at the bottom of VPS page. If you still have any questions related to VPS add-ons, feel free to contact our 24/7/365 sales team.
]]>- The Main IP Address of your VPS is
1.2.3.4. - You have purchased an additional IP address through the AKLWEB HOST control panel, and you were assigned
1.2.3.5.
After purchasing an additional IPv4 address you must restart the VPS using the “Server Restart” feature from within the AKLWEB HOST control panel. This must be done regardless of the installed operating system.
Each example below will configure the secondary IP address to become automatically available, and remain configured even after your server is rebooted. You can test if the IP address is configured by pinging it with the ping utility on your client computer.
Windows Server 2012
The main IPv4 address must be configured manually before adding another IPv4 address.
To configure the main IPv4 manually:
- Open a Command Prompt (
cmd.exe). - Type:
ipconfig /all - There will be a page or two of output. Find the page that has information about your primary ethernet adapter, which is typically “Ethernet adapter Ethernet 2”. Write down the values for IPv4 Address, Subnet Mask, Default Gateway, and DNS Servers.
Ethernet adapter Ethernet 2: Connection-specific DNS Suffix . : Physical Address. . . . . . . . . : 00-00-00-00-00-00 DHCP Enabled. . . . . . . . . . . : No Autoconfiguration Enabled . . . . : Yes IPv4 Address. . . . . . . . . . . : 1.2.3.4(Preferred) Subnet Mask . . . . . . . . . . . : 255.255.254.0 Default Gateway . . . . . . . . . : 1.2.3.1 DNS Servers . . . . . . . . . . . : 108.61.10.10 NetBIOS over Tcpip. . . . . . . . : Enabled - Open the windows control panel. You can access it from the start menu.
- Click “Network and Internet”.
- Click “Network and Sharing Center”.
- Click “Change adapter settings”.
- Right click on the primary ethernet adapter, and click “Properties”. The “Ethernet Properties” window will open.
- Select “Internet Protocol Version 4 (TCP/IPv4)”, then click the “Properties” button. The “Internet Protocol Version 4 (TCP/IPv4) Properties” window will open.
- Check the box that reads “Use the following IP address:”. Populate the fields beneath it with the values you wrote down earlier.
- Check the box that reads “Use the following DNS server addresses:”. Populate the fields beneath it with the values you wrote down earlier. If you only have one DNS server, leave “Alternate DNS server” empty.
- Click “OK”. Then click “OK” on the “Ethernet Properties” window. The main IPv4 has been configured manually. Note that it is normal for the connection to hiccup after pressing “OK”.
Add secondary IPv4 using cmd.exe:
netsh interface ipv4 add address "Ethernet" 1.2.3.5 255.255.255.0
Add secondary IPv4 using a remote login:
- Open the windows control panel. You can access it from the start menu.
- Click “Network and Internet”.
- Click “Network and Sharing Center”.
- Click “Change adapter settings”.
- Right click on the primary ethernet adapter, and click “Properties”. The “Ethernet Properties” window will open.
- Select “Internet Protocol Version 4 (TCP/IPv4)”, then click the “Properties” button. The “Internet Protocol Version 4 (TCP/IPv4) Properties” window will open.
- Click “Advanced…”. The “Advanced TCP/IP Settings” window will open.
- In the “IP addresses” group, click “Add…”. The “TCP/IP Address” window will open.
- Fill in the “IP address” and “Subnet mask” boxes. Use “1.2.3.5” for the IP address and “255.255.255.0” as the subnet mask.
- Click “Add”. The “TCP/IP Address” window will close.
- Click “OK” on the “Advanced TCP/IP Settings” window. This window will close.
- Click “OK” on the “Internet Protocol Version 4 (TCP/IPv4) Properties” window. This window will close.
- Click “OK” on the “Ethernet Properties” window. This window will close, and your secondary IP address will be configured.
CentOS 6
- Change the boot protocol from “dhcp” to “static” on eth0. If you are already using a static binding, you can skip this step. Otherwise, follow these directions:
- Open
/etc/sysconfig/network-scripts/ifcfg-eth0in a text editor. - Change
BOOTPROTO=dhcptoBOOTPROTO=static. - Add these lines at the end of the file. Substitute “
[mainip]“, “[netmask]“, and “[gateway]” with the values from the “IPv4” tab on your AKLWEB HOST control panel.IPADDR=[mainip] NETMASK=[netmask] GATEWAY=[gateway] - Run
ifup eth0.
- Open
- Create the file
/etc/sysconfig/network-scripts/ifcfg-eth0:1. - Populate the file with the following contents:
DEVICE=eth0:1 BOOTPROTO=static IPADDR=1.2.3.5 ONBOOT=yes - Activate the alias with the following command:
ifup eth0:1
Ubuntu
- Determine the name of your ethernet device. In this example, we’ll use
eth0.ip link show - Add the following lines in
/etc/network/interfaces:auto eth0:0 iface eth0:0 inet static address 1.2.3.5 netmask 255.255.255.0 - Activate the alias with the following command:
ifup eth0:0
Ubuntu 16.x
- Determine the name of your ethernet device. In this example, we’ll use
ens0.ip link show - Add the following lines in
/etc/network/interfaces:auto ens3:0 iface ens3:0 inet static address 1.2.3.5 netmask 255.255.255.0 - Activate the alias with the following command:
ifup ens3:0
Please note: You need to make sure your interface name matches that of the example: e.g. eth0, ens3 etc… and make sure to modify the example configuration to use the correct interface name and IPs.
FreeBSD 10
- Add the following lines in
/etc/rc.conf:ifconfig_vtnet0_alias0="1.2.3.5 netmask 255.255.255.0" - Run the following command to restart networking:
/etc/rc.d/netif restart && /etc/rc.d/routing restart