We will explain how you can install the FFMPEG application on a cPanel server via WHM terminal.
If you want the users to stream the audio-video content on your website, you need to install FFMPEG. FFMPEG is an application that has cross-platform support, meaning it can run on all platforms.
It also comes with a PHP extension allowing the users to process their files via web pages with the PHP language.
To Install FFMPEG
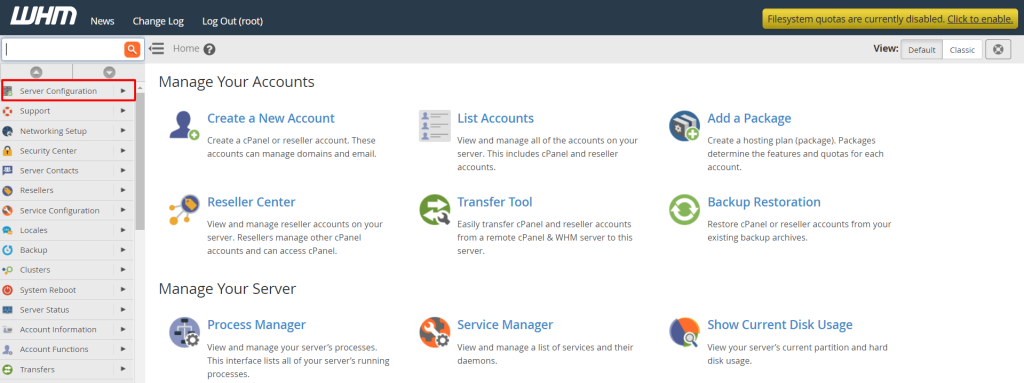
1. Log in to your root account of the WHM panel.
2. Select the Server Configuration option from the navigation menu.

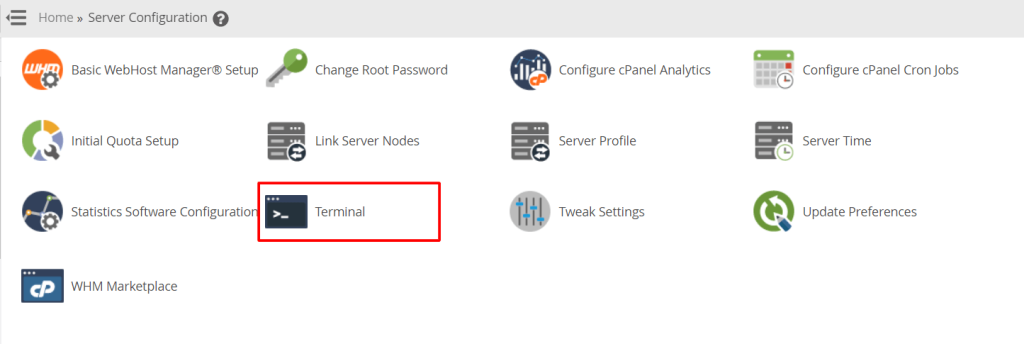
3. Click on Terminal.

The terminal interface will open.
The installation of the FFMPEG application requires you to follow a particular order.
You have to copy the following commands on the interface accordingly.
1. Install EPEL repo:
First, you have to install the EPEL repo. Copy/enter this command on the terminal.
yum install epel-releaseThere are chances of this command failing in some rare cases. If it does fail, it will return you No package epel-release available. If that happens, you will have to download the rpm of the epel repo.
Enter / Copy these commands to the terminal:
wget https://dl.fedoraproject.org/pub/epel/epel-release-latest-7.noarch.rpm
rpm -ivh epel-release-latest-7.noarch.rpm
2. Install NUX desktop repo:
After installing the EPEL repo, you have to download and install the NUX desktop repo.
The command for it is this:
rpm -Uvh http://li.nux.ro/download/nux/dextop/el7/x86_64/nux-dextop-release-0-5.el7.nux.noarch.rpm3. Install FFMPEG
After installing the EPEL repo and the NUX desktop repo, your system is set to install and run the FFMPEG application.
The command to install the FFMPEG application is:
yum -y install ffmpeg ffmpeg-devel4. Confirm FFMPEG installation
You can confirm if the FFMPEG is operational or not by checking its installed version on your server.
Enter / Copy this command:
ffmpeg -versionThis is how you will successfully download and install the FFMPEG application with the WHM terminal on your cPanel server.
5. Integrate FFMPEG with WHM/cPanel
Now, you can integrate it with WHM/cPanel to make it accessible via the control panel.
Follow these steps to integrate FFMPEG:
- Log in to WHM as the root user.
- Navigate to Home > Software > EasyApache 4.
- Click on “Customize” next to the currently installed profile.
- In the “Apache Modules” section, scroll down and locate “FFMPEG”.
- Check the box next to “FFMPEG” to enable it.
- Click on “Next” and proceed with the EasyApache 4 build process.
- Once the build is complete, FFMPEG will be integrated with WHM/cPanel, and you can start using it via the control panel.